


Problem: Are your windows feeling flat and lacking personality?
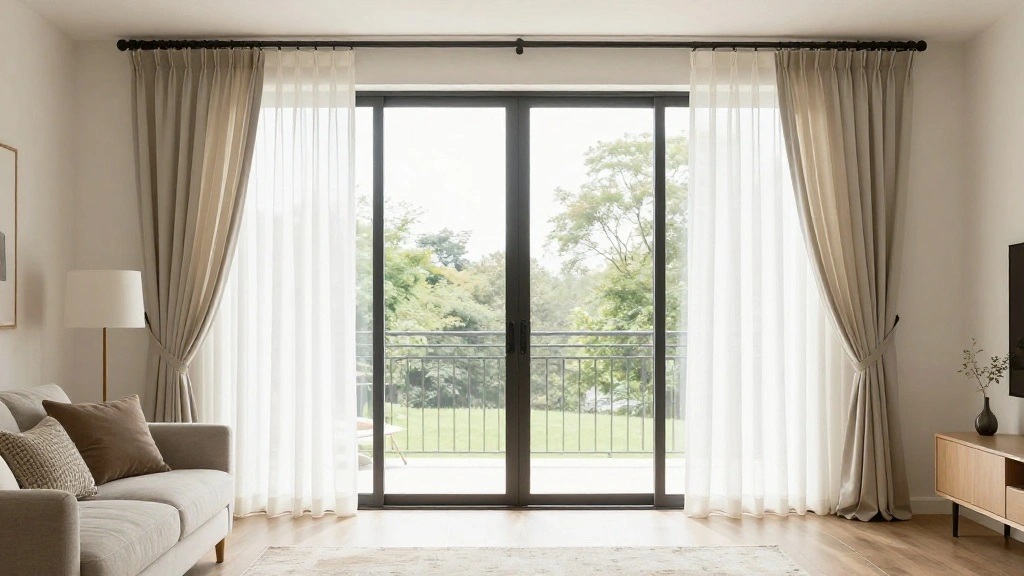
Layering curtains is a quick and effective way to add depth, warmth, and sophistication to any room. By learning to layer your curtains properly, you can transform your space from ordinary to extraordinary.
In this guide, you will accomplish a beautifully layered curtain look that adds both style and function, while keeping your budget in check.
You will specifically learn how to choose the right curtain types, hang them correctly, and accessorize with rods and clips for a designer finish. This guide is designed for beginners, and you can expect to spend around 1-2 hours on this project.
Ready to elevate your windows? Let’s dive in!
TL;DR Summary
- Learn how to layer curtains for a stylish look.
- Gather necessary materials before starting.
- Follow six easy steps to achieve a designer finish.
- Feel proud of your transformed space within 1-2 hours!
TL;DR Summary
Editor’s Choice


HNYYZL Curtain Clips,50PCS Plastic Curtain Rod Rings,Curtain Rings with …

Black Curtain Rods 2 Packs for Windows 36″- 48″, Decorative Drapery Rod …
Prerequisites/Materials Needed
- Curtains (1 sheer, 1 blackout or decorative) – 2 sets
- Curtain rods – 2 (one for each layer)
- Curtain clips or rings – 8-10
- Measuring tape – 1
- Scissors – 1 pair
- Drill or screwdriver – 1
- Level – 1
- Step ladder – 1 (if needed)
Prerequisites/Materials Needed
Editor’s Choice

GXOACKJ Curtain Rods for windows 32-48 inch, 5/8 inch Decorative Curtain…

NICETOWN Sheer Canopy Bed Curtains Panels 216 – Home Decoration Sheer Vo…

NICETOWN Pitch Black Solid Thermal Insulated Grommet Blackout Curtains/D…
Skill Level & Time Estimate
Skill Level: beginner
Total time estimate: 1-2 hours
Breakdown:
- Gather materials: 15-30 minutes
- Measure and mark: 15 minutes
- Hang curtain rods: 30-45 minutes
- Hang curtains: 30 minutes
Skill Level & Time Estimate
Editor’s Choice
GXOACKJ Curtain Rods for windows 32-48 inch, 5/8 inch Decorative Curtain…

GDMINLO Soft Tape Measure Double Scale Body Sewing Flexible Tailor Craft…

40 Pack Curtain Rings with Clips, Drapery Clips with Rings, Drapes Rings…
Step 1: Choose Your Curtains

Start by selecting the right types of curtains for layering. You will need a sheer curtain to allow light in and a heavier curtain for insulation and privacy. Follow these sub-steps:
- Decide on colors that complement your room decor.
- Select fabrics: lightweight for sheers and thicker materials for the second layer.
- Consider patterns: solids work well with prints and vice versa.
Pro Tip: Ensure both curtains are of the same length for a cohesive look.
Why this matters: The right combination enhances the aesthetic appeal of your space.
Time estimate: 20 minutes.
Step 1: Choose Your Curtains
Editor’s Choice

2PCS Flower Curtain Ties,Boho Cute Curtain Holdbacks Elegant Curtain Tie…
KOUFALL 63 Inch Length Curtains 2 Panels Set,Blackout Room Darkening The…

Vangao Green Floral Linen Blend Curtains for Living Room 84 Inches Long …
Step 2: Measure and Mark Window Width
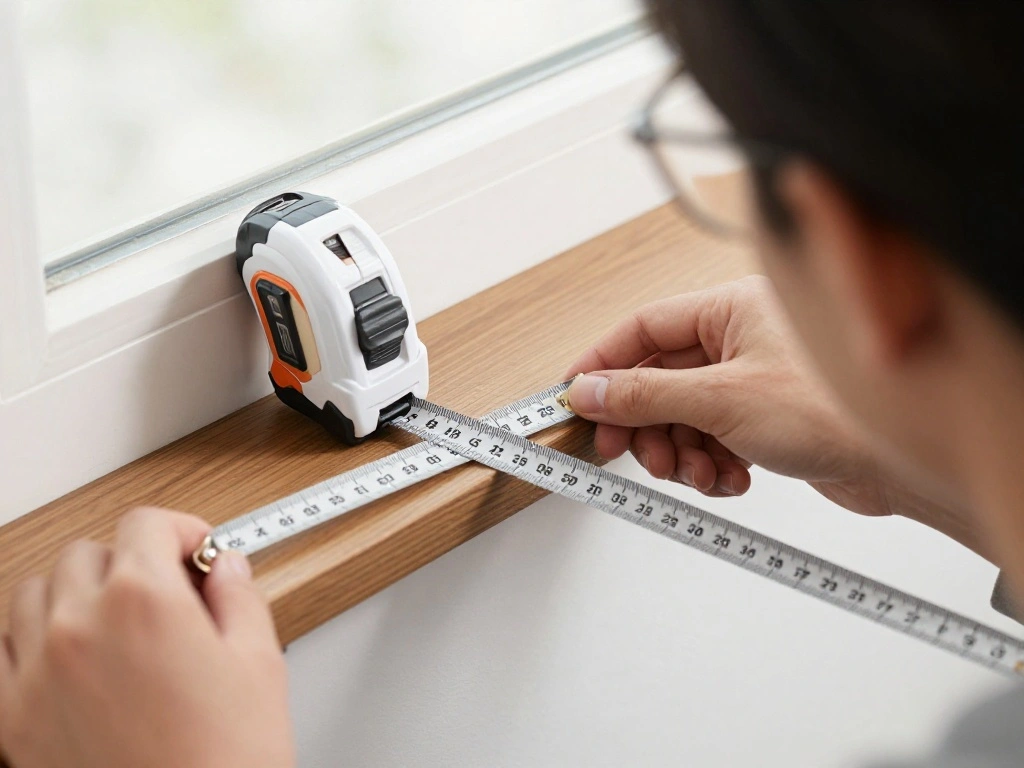
Next, measure the width of your window to ensure the curtains will fit nicely. Follow these sub-steps:
- Use a measuring tape to measure the width of the window.
- Add 4-6 inches on each side for proper coverage.
- Mark the spots where you will install the curtain rods.
Warning: Incorrect measurements can lead to a poor fit.
Why this matters: Accurate measurements create a polished look and ensure full coverage.
Time estimate: 15 minutes.
Step 2: Measure and Mark Window Width
Editor’s Choice
GXOACKJ Curtain Rods for windows 32-48 inch, 5/8 inch Decorative Curtain…

Digital Caliper, Sangabery 0-6 inches Caliper with Large LCD Screen, Aut…
Step 3: Install the Curtain Rods
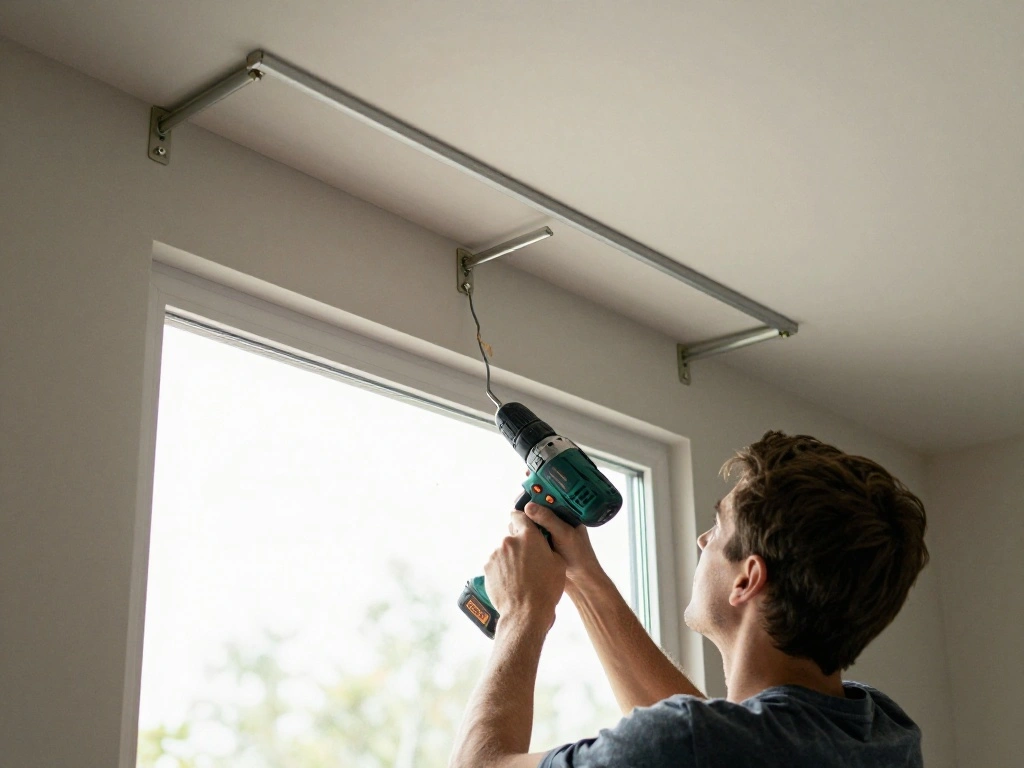
Now it’s time to install your curtain rods at the marked spots. Follow these sub-steps:
- Use a level to ensure the rod brackets are straight.
- Drill holes for the brackets and secure them with screws.
- Attach the curtain rods to the installed brackets.
Pro Tip: Install the top of the rod higher than the window for a taller appearance.
Why this matters: Proper installation ensures the rods can support the weight of the curtains.
Time estimate: 30-45 minutes.
Step 3: Install the Curtain Rods
Editor’s Choice

Power Drill Cordless: DEKOPRO Cordless Drill 20V Electric Power Drills S…

3Pcs Circular Bubble Level Bullseye Degree Marked Surface Round Spirit L…

KOLAKO Curtain Rod Bracket, Heavy Duty Curtain Rod Holders Single Decora…
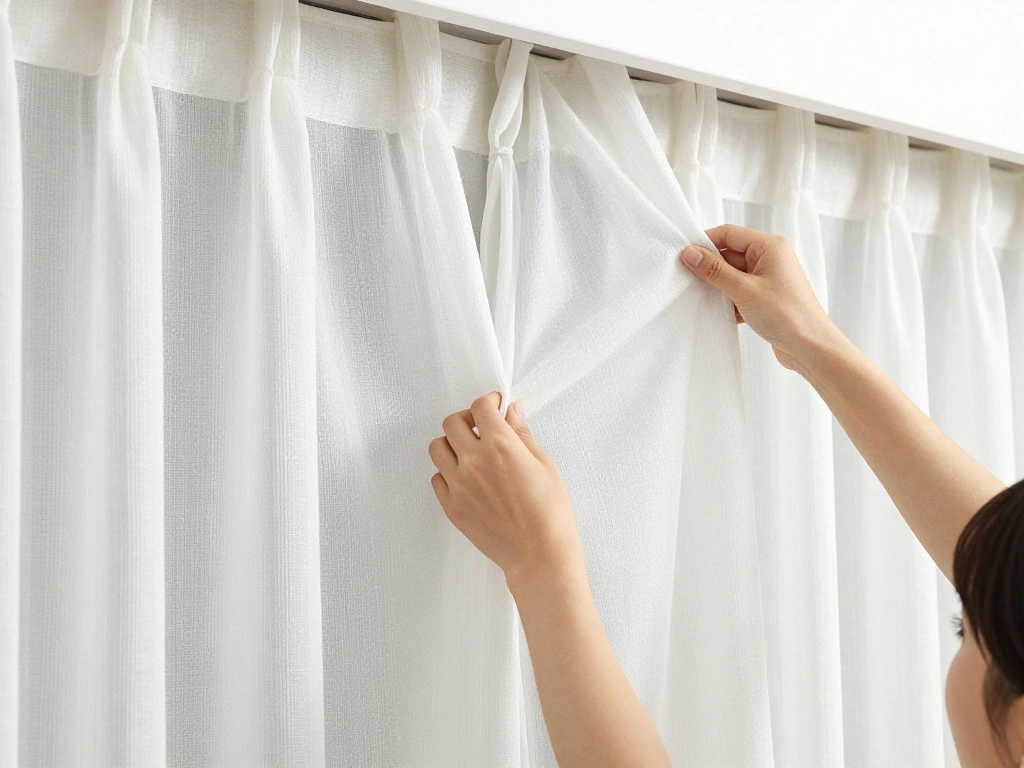
Step 4: Hang the Sheer Curtains
With the rods in place, it’s time to hang the sheer curtains. Follow these sub-steps:
- Thread the sheer curtains onto the rod or attach them using clips.
- Ensure they are evenly distributed across the rod.
- Adjust the length to your preference, letting them fall to the desired length.
Warning: Ensure the curtains aren’t too short; they should touch the floor for a finished look.
Why this matters: Proper hanging creates a light, airy feel in the room.
Time estimate: 20-30 minutes.
Step 4: Hang the Sheer Curtains
Editor’s Choice

WeeksEight 44 Pack White Curtain Rings with Clips, Curtain Hooks Hangers…

VISIONTEX Sheer Curtains 84 Inches Long 2 Panels Set Cream Beige Embroid…

Decopolitan 5/8″ Fluted Ball Curtain Rod Set, 26 to 48 Inches, Pink
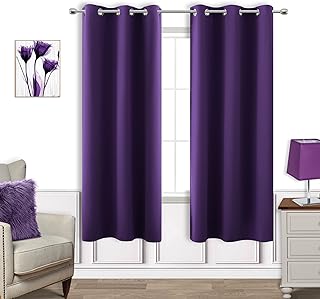
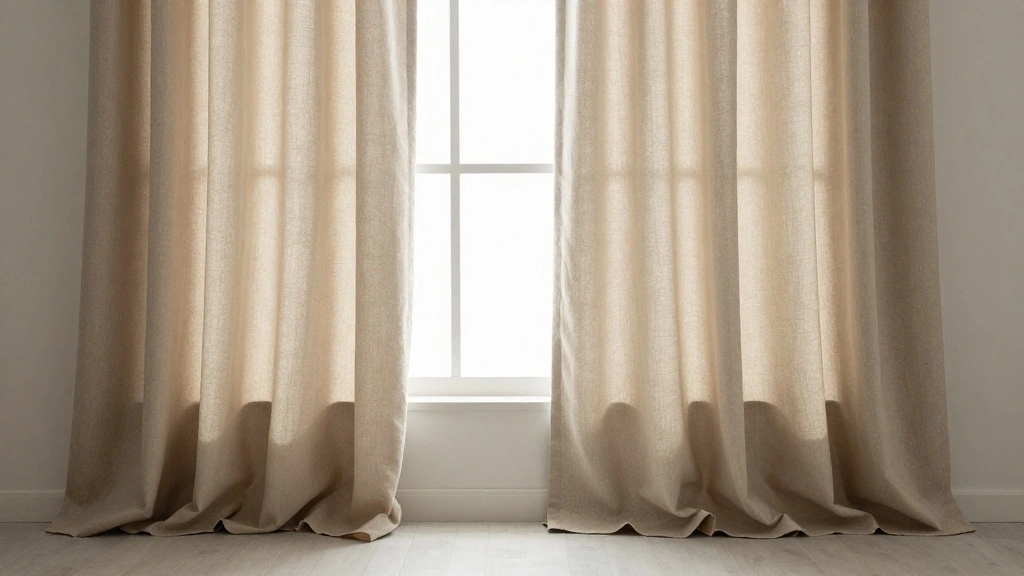
Step 5: Hang the Heavier Curtains
Now, hang your heavier curtains to complete the layering. Follow these sub-steps:
- Thread the heavier curtains onto the second rod or attach them using clips.
- Position them so they overlap slightly with the sheer curtains.
- Adjust for an even appearance on both sides.
Pro Tip: Use decorative clips for added style.
Why this matters: Layering adds depth and texture, enhancing the overall look.
Time estimate: 20-30 minutes.
Step 5: Hang the Heavier Curtains
Editor’s Choice

2Pcs T Shirt Clips Shirt Ties Metal Scarf Rings for Silk Scarf T-Shirt f…

Byondeth Curtain Rods for Windows 16 to 88 Inches Adjustable Length 1 In…

SpaceDresser Basic Rod Pocket Sheer Voile Window Curtain Panels White 1 …
Step 6: Final Touches and Adjustments
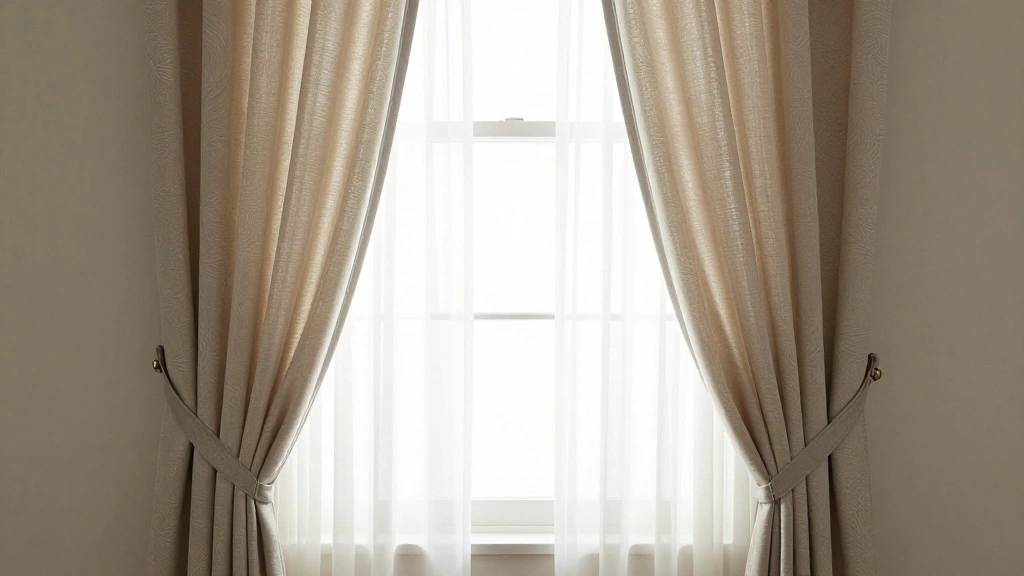
Finally, make any necessary adjustments to ensure everything looks perfect. Follow these sub-steps:
- Adjust the lengths of both sets of curtains for uniformity.
- Check that the curtains open and close smoothly.
- Consider adding tiebacks for a styled look during the day.
Warning: Avoid overcrowding the window with too many accessories.
Why this matters: Proper adjustments give your layered curtains a professional finish.
Time estimate: 15-20 minutes.
Step 6: Final Touches and Adjustments
Editor’s Choice

Firecore Laser Level with Receiver Kit, 1/13″ High Accuracy, Laser Level…

Hion 2 Pcs Boho Curtain Tiebacks,Wood Beads Curtain Holdbacks,Outdoor Fa…
GXOACKJ Curtain Rods for windows 32-48 inch, 5/8 inch Decorative Curtain…
Pro Tips
- Color Coordination: Choose colors that complement your existing decor for a harmonious look.
- Fabric Choice: Mix textures for a more dynamic appearance, like silk and linen.
- Layering Depth: Use varying lengths of curtains to create visual interest.
- Hardware Matters: Invest in quality rods and brackets for durability and style.
- Accessorize Smartly: Use decorative weights to keep curtains in place and looking neat.
Pro Tips
Editor’s Choice
GXOACKJ Curtain Rods for windows 32-48 inch, 5/8 inch Decorative Curtain…

AceOrbit 8 Pair Magnetic Curtain Closure Detachable, Heart Shaped Curtai…

14 Pack Curtain Weight, Weight Cloth Curtain Weights for Home, Heavy Iro…
Common Mistakes to Avoid
Warning: Not measuring correctly can lead to curtains that don’t fit. Always double-check your measurements.
Warning: Hanging curtains too low can make ceilings feel lower; always aim for height.
Warning: Neglecting to consider light flow can result in a dark room; balance sheer and opaque fabrics wisely.
Common Mistakes to Avoid
Editor’s Choice

CorkLatta Black Shower Curtain Rod 31 to 80 Inch,1 Inch Diameter Adjusta…

Breling 5ft x 10ft 6 Panels 12 Inches Ceiling Drapes Hanging Kit with Dr…

6 Packs Retractable Tape Measure + 2PCS Soft Measuring Tape for Body Mea…
Troubleshooting Section
Problem: Curtains are too short.
Solution: Consider purchasing longer curtains or adjusting the mounting height of the rod.
Problem: Curtains don’t open smoothly.
Solution: Check for tangles and ensure the rod is level.
Problem: Curtains look uneven.
Solution: Adjust the hanging clips to even out the fabric.
Troubleshooting Section
Editor’s Choice

120 Inch Linen Curtains Pinch Pleated for Living Room Tall Windows Custo…

40 Pack Curtain Rings with Clips, Drapery Clips with Rings, Drapes Rings…

Variations/Alternative Methods
Alternative 1: Use a tension rod for sheer curtains alone in small spaces.
Alternative 2: Try using a curtain panel as a wall decor for an artistic touch.
Alternative 3: Layer with blinds for added privacy while retaining light.
Variations/Alternative Methods
Editor’s Choice

1 Pack Spring Tension Rods 33-59 Inches, 5/8 Inch Diameter White No Dril…

OWENIE Sheer Curtains 84 inches Long 2 Panels Set for Living Room/Bedroo…

Cordless Light Filtering Mini Blinds for Indoor Windows – 29 Inch Width,…
FAQs
What if I don’t have curtain clips? You can use curtain rings with hooks instead.
How long should I let the curtains hang? Ideally, they should touch the floor or just slightly puddle for an elegant look.
Is it safe to hang heavy curtains? Yes, as long as you use sturdy rods and brackets designed for the weight.
FAQs
Editor’s Choice

42 Pack Curtain Rings with Clips 1.26″ Interior Diameter,Metal Drapery R…

AAtter Pink and Black Window Curtain Ombre Abstract Women Gothic Preppy …

GXOACKJ 2 Pack Black Curtain Rods for windows 32 to 48 inch, 5/8 inch Sp…
Conclusion
Congratulations on successfully layering your curtains! You’ve transformed your space into a stylish haven. Celebrate your achievement and enjoy the enhanced atmosphere in your room.
Next steps? Consider adding decorative elements like tiebacks or curtain weights for further personalization. If you’re looking for more home decor tips, check out our related guides for inspiration!

I've spent years obsessing over the details that make a house feel like a home — from the perfect bedding layers to a thoughtfully styled coffee corner. My focus is on modern, aesthetic home decor ideas that are beautiful, trend-aware, and actually achievable. Great style shouldn't require a big budget — just the right inspiration.
Follow on Facebook