



You’ll lower your crib in seven steps, starting with your manual and basic tools.
Remove bedding, loosen bolts, and drop the mattress when your baby sits up or pulls to stand.
Secure brackets, test for wobble, and check that gaps stay under 2⅜ inches.
When to Lower the Crib: Milestone Guide
Watch your baby’s movements closely, because timing matters more than age when you’re adjusting the crib height. You’ll need to lower the mattress when your little one starts sitting up without help, usually between five and eight months. This first drop keeps them safer during sleep, since rolling and shifting happen more now.
Once you spot your baby pulling up to stand, don’t wait. Move the mattress to the lowest setting right away, because toppling becomes a real danger when their head’s heavier than their body. Keep it there through the standing stage.
If you catch them trying to climb, that’s your signal the crib days are ending. When the rail drops below mid-chest, about 35 inches, switch to a toddler bed for safer sleep.
Recommended Products

ONLY CRIB RAIL THAT FIRMLY ANCHORS TO BED FRAME WITH REINFORCED CLAMPS for 100% safety. Cannot slip out of place like other crib rails.

ONLY CRIB RAIL THAT FIRMLY ANCHORS TO BED FRAME WITH REINFORCED CLAMPS for 100% safety. Cannot slip out of place like other crib rails.

SAFE & SECURE CRIB BED RAIL: Designed for cribs only, this sturdy baby bed rail provides added protection for toddlers and young children. The 16-inch tall guard and 33-inch length help prevent nighttime falls while sleeping.
Lower the Crib to Middle Height When Sitting Starts

Your baby’s sitting milestone means it’s time to grab your tools and move the mattress down. When your baby starts sitting independently, usually around 5 to 8 months, you’ll need to lower the crib mattress from the highest position to the middle setting.
This step protects your growing infant. Sitting brings new reach and movement, so crib safety demands you don’t delay. The American Academy of Pediatrics emphasizes proactive adjustments for a safe sleep environment.
Most adjustable cribs offer three height positions. You’ll use the middle setting now, before your little one develops more mobility. After you move the crib mattress, press firmly to check that everything locks securely. Stability matters, so verify twice before returning your baby to rest.
Recommended Products

TRUE 5-IN-1 VERSATILITY: The Synergy grows from a crib to a toddler bed, daybed, full-size bed with footboard, and full-size bed without footboard, five distinct stages. Toddler guardrail, stabilizer, and full-size bed rails sold separately.

Smart 3-in-1 Convertible Crib - Designed to grow with your child, this crib transitions from a crib (mattress sold separately) to a toddler bed and full-size daybed (conversion kits sold separately). Built-in teething guards protect both your baby’s gums and the crib rails, ensuring durability and safe use through every stage.

TRUE 5-IN-1 VERSATILITY: The Synergy grows from a crib to a toddler bed, daybed, full-size bed with footboard, and full-size bed without footboard, five distinct stages. Toddler guardrail, stabilizer, and full-size bed rails sold separately.
Drop the Crib to Lowest Height Before Pulling Up
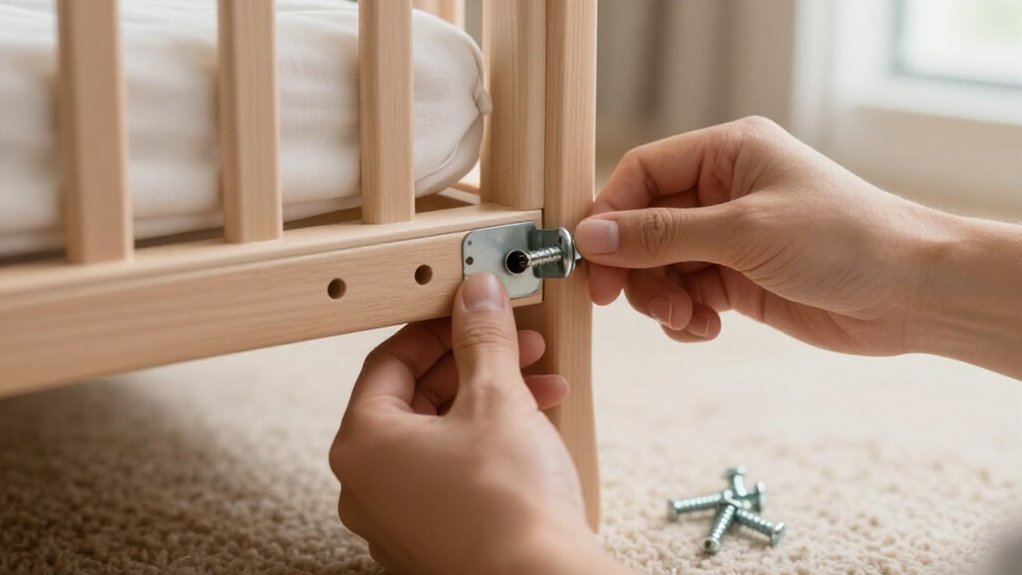
The pulling-up milestone demands another crib adjustment, and you’ll want to act quickly once you see those first attempts. Lower your baby’s crib to the lowest setting before they can pull up, since their heavy head makes falls especially dangerous.
Keep the crib mattress at this lowest position even if your baby isn’t fully standing yet. Babies often climb rails before they stand well, so don’t wait by baby’s age alone.
You’ll remove bedding and the crib mattress, move the hardware to the bottom position, then reassemble firmly. Press down hard to check sturdiness.
Never use DIY tricks to drop the mattress lower, because gaps between mattress and rail create entrapment risks. Following the manufacturer’s steps exactly will keep your baby safe at this active stage.
Recommended Products

【♚♚】Material: Metal;【♚♚】Quantity: 100pcs;

Crib Screws Hardware Replacement: Please pay attention to the size.The bolt size is M6*16/40/60/80mm & barrel nuts size are M6*12mm.

Product specification:Crib Screws Replacement Set Of M6 x15mm/20mm/30mm/40mm/50mm/60mm/70mm/80mm;8 sizes 32pcs Furniture Bolts;Threaded Hole Diameter 6 mm/ 0.24";with M6 Barrel Nuts--28pcs;M6*30mm Dowel Pins--10pcs;1pcs M6 Wrenches;
Prepare to Adjust: Check Your Manual and Gather Tools
Before you start lowering the crib, grab your instruction manual and read the section on mattress height adjustments. Your crib’s instruction will show exactly how the mattress moves between settings, and it’ll tell you if there are limits on lowering to the bottom.
Most cribs start at the highest setting for newborns, then drop to the middle setting, and finally the lowest position as your baby grows. You’ll need to know which crib height you’re starting from and where you’re headed next.
Gather your tools now, usually a wrench or screwdriver, so you’re ready to work safely. Following these steps supports safe sleep practices and keeps baby sleep secure through every stage. Don’t skip the manual, even if you’ve adjusted the crib before.
Recommended Products

GREENGUARD GOLD CERTIFIED: This product has undergone rigorous scientific testing for over 10,000 chemical emissions and VOCs. It contributes to cleaner indoor air, creating a healthier environment for your baby. Proudly made in the USA

Safety Certifications: Greenguard Gold Certified, JPMA certified to meet/exceed CPSC/ASTM safety standards, passes all flammability, phthalate, lead & toxicity tests
Remove Bedding and Unscrew the Mattress Base
Once you’ve checked your manual and gathered your tools, you’re ready to start the actual work. First, remove bedding from the crib, including sheets, blankets, and any sleep training aids. Lift out the mattress completely so you’re working with a bare frame. This gives you clear access to all attachment points.
Next, locate the bolts or fasteners that hold the mattress base in its current position. You’ll typically find these at each corner, sometimes with additional supports along the sides. Unscrew the mattress base carefully, keeping all hardware in a safe spot.
Don’t force stuck bolts; apply steady pressure instead. Lower the base according to your manual’s guidance, then reattach and tighten every fastener fully. Press firmly on all corners to confirm the base is sturdy and won’t wobble under your baby.
Recommended Products
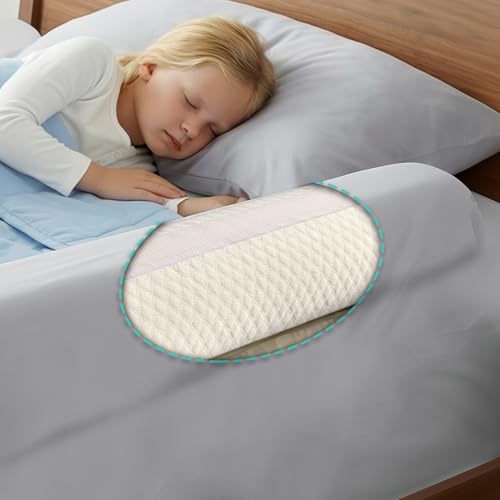
The First Advancement in Bed Rails in 50 Years - Hiccapop Bed Bumpers Don’t “cage In” Your Little One Like Traditional Metal Bed Rails. They Are Safer and More Comfortable for Your Sleeping Child.

ADDED BEDTIME SECURITY — Creates a protective barrier along the open side of the bed to help provide added security during the crib-to-toddler-bed transition.

ADDED BEDTIME SECURITY — Creates a protective barrier along the open side of the bed to help provide added security during the crib-to-toddler-bed transition.
Set the New Height and Lock the Frame
You’ll want to pick a height that matches what your baby can do right now, so lower it all the way down once they start pulling themselves up on anything.
After you move the frame, line up every bolt and bracket with the holes meant for that setting, then tighten each one until there’s no wiggle or gap left. Give the frame a hard shake and a push with your hand to make sure the lock holds firm before you move on.
Recommended Products

Newborn Bassinet Nearby: This Maxi-Cosi Iora baby bassinet sits within arm's reach, so night feeds and daytime naps are easier and calmer

TRUE 5-IN-1 VERSATILITY: The Synergy grows from a crib to a toddler bed, daybed, full-size bed with footboard, and full-size bed without footboard, five distinct stages. Toddler guardrail, stabilizer, and full-size bed rails sold separately.

TRUE 5-IN-1 VERSATILITY: The Synergy grows from a crib to a toddler bed, daybed, full-size bed with footboard, and full-size bed without footboard, five distinct stages. Toddler guardrail, stabilizer, and full-size bed rails sold separately.
Choose Appropriate Height
At this stage, you’re selecting the right height for your baby’s current skills. Check your baby’s setting against their abilities. When they start sitting on their own, move the crib and crib mattress to the middle position. Once they’re able to pull up to stand, it’s time to lower the Baby Crib to the bottom level. Their head gets heavier now, so tipping and falling become bigger dangers.
Before you begin, remove the crib mattress and all bedding so you can reach the hardware without anything in your way. Unscrew the bolts, shift the frame to the chosen height, then tighten everything back down. Follow your manual closely for the exact steps your model needs.
After reassembly, press hard on the frame to check for wobble. If the manual doesn’t list a floor-level option, it’s time to move to a toddler bed instead. Never try DIY fixes, since only manufacturer-approved heights keep gaps small and entrapment risks low.
Secure Locking Mechanism
After you’ve chosen the right height, it’s time to set the frame and lock it in place. With the bedding and mattress removed, loosen the crib’s locking hardware, then move the mattress frame to the correct height setting. Re-tighten every bolt and attachment firmly.
Make sure the height clicks or fully engages in the new position, so the secure locking mechanism holds the frame without slipping. Press down on the crib rail, then give the frame a firm shake test to confirm it does not wobble or lift.
Check that both sides of the crib sit at the same level, and verify every bracket is tightened as the manual directs. Re-check for gaps or loosened parts around the mattress area before you put the mattress back in.
If your baby is five months old or older, it’s time to change to this lower setting for safety.
Test Stability and Clear Unsafe Items
Once you’ve lowered the mattress and reassembled the crib, press down firmly on the center and edges to check for any wobbling or instability. You’re setting up the right crib when they start moving more, so take time to help your baby stay safe in their crib. Confirm all hardware sits tight, and measure that slat gaps don’t exceed 2⅜ inches. A recommended crib keeps your little one secure through every stage.
Next, clear every unsafe item from the sleep space. Remove pillows, quilts, sheepskins, bumper pads, and loose blankets. Dress your baby in a sleep sack instead of loose bedding. Use only a snug fitted sheet on a firm, flat mattress with no gaps at the sides. Skip crib tents and pillow-like toys entirely. Check these details before each use.
Recommended Products

Products Hardware Kit: This set includes M6 crib screws in 4 lengths (20mm, 40mm, 60mm, 80mm) along with matching barrel nuts and wrenches for assembling cribs, bunk beds, headboards, and other furniture.

☛Include M6 x 15mm, M6 x 25mm, M6 x35mm, M6 x 45mm, M6 x 55mm Furniture Bolt Hex Head;

I've spent years obsessing over the details that make a house feel like a home — from the perfect bedding layers to a thoughtfully styled coffee corner. My focus is on modern, aesthetic home decor ideas that are beautiful, trend-aware, and actually achievable. Great style shouldn't require a big budget — just the right inspiration.
Follow on Facebook