



A curtain hung wrong pools on the floor like spilled milk, wasted and sad.
You can avoid this mess in five steps, each one simple enough to finish before your tea cools.
You’ll need pinch pleat hooks, a pole or track, and about twenty minutes of patience.
The trick is testing length twice so you don’t drill holes you’ll regret.
Get your tools ready, and we’ll start with the one mistake most people make right at the beginning.
Identify Your Heading Type and Choose Pole or Track
Start by checking your curtain heading to see what you’re working with. Look for double pinch pleat, triple pinch pleat, or goblet styles, since you’ll insert hooks into stitched pockets at the back of each pleat.
Next, decide whether you’ll hang pinch pleat curtains on a pole or track, as this shapes your entire approach.
Your choice of pole or track fundamentally shapes how you’ll hang pinch pleat curtains.
For a pole, thread each hook into a curtain ring, keeping hooks near the top edge so pleats fall neatly and stay hidden. For a track, hook each one into the gliders, positioning them midway or near the bottom of the heading retainer so the fabric covers the hardware.
If you’re unsure about placement, hang a few pleats temporarily, then slide hooks up or down before securing every pleat.
Recommended Products

1. Create Neat Pinch Pleats These curtain hooks for drapes slide into compatible pleat tape or curtain header pockets to create clean, evenly spaced folds and give ordinary...
Position Pinch Pleat Hooks for Your Hardware
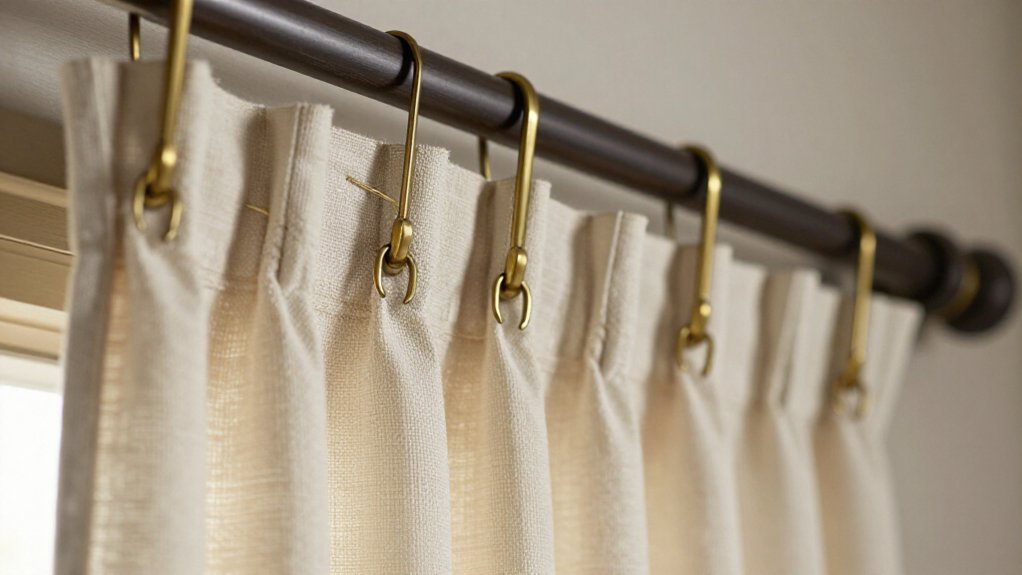
Slide each hook so its point tucks under the stitches at the back of every pleat, then keep the hook body level with the top edge of the heading. This keeps your pinch pleat curtains hanging straight without twisting.
If your hooks have a plastic retainer, you can slide them up or down to fine-tune length before you lock them in place. Place hooks higher on the heading for more fullness and pooling at the floor, or lower for a shorter drop.
For a standard pair on your curtain pole, add one hook on each outer edge of the first panel, but leave the inner edge free on the second panel so they overlap neatly in the middle. Insert just a few hooks first, hang temporarily, and adjust height if needed.
Recommended Products

【Complete 60PCS Set for Curtain Installation】Receive 60 pinch pleat curtain hooks designed for creating neat, elegant pleats on your drapes. Each curtain hook features one main hook with four prongs to securely hold curtain fabric, making these curtain pleat hooks, pleated curtain hooks, and pinch pleated curtain hooks ideal for replacing worn or missing hardware in your home.

Advantages of the Curtain Hooks: These curtain hooks for drapes provide an amazing pleating effect. The drapery hooks fit pleated curtains and can be machine washed with your curtains without removing them.
Test Curtain Length Before Finalizing Hooks
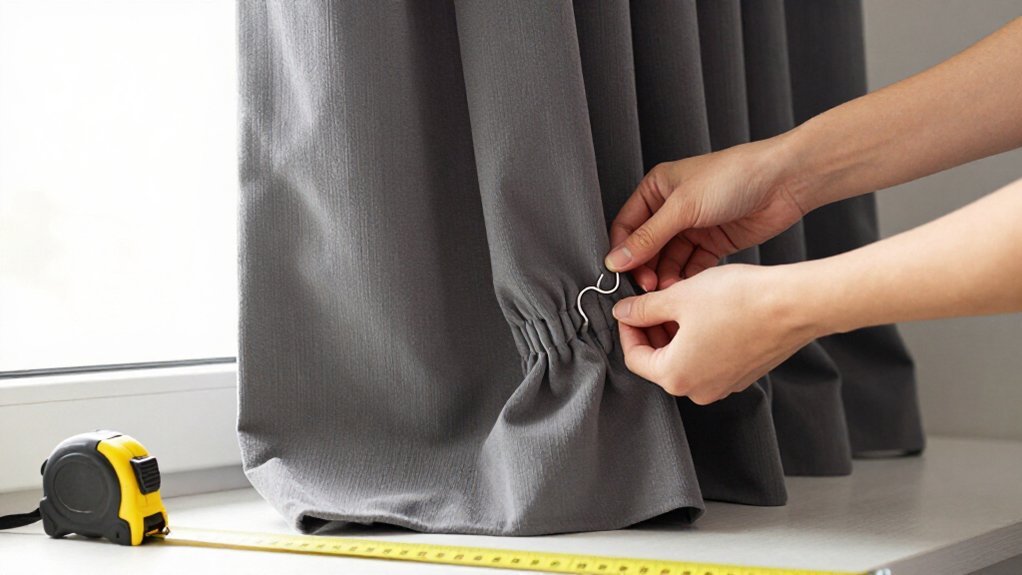
Once you’ve placed those first hooks, hang the panel temporarily so you can judge the length before locking everything in. Clip the hooks onto curtain rings or gliders, then step back and check where the hem falls. If it’s too long or short, you’ll adjust.
To fine-tune, move each hook up or down the heading tape. Slide it toward the top pocket and the bottom drops lower for more pooling. Shift it toward the bottom pocket and the curtain shortens.
Make small tweaks until the drop looks right. Draw the panel closed gently, and scan across for evenness. Fix any uneven spots now.
Only when you’re satisfied with the length and look should you insert hooks into every remaining pleat at that same height, then attach them all to your curtain rings or gliders.
Recommended Products

Secure and Reliable Hold: These drapery hooks measure 1.2 inches in length and 0.7 inch in width, featuring sharp tips that glide effortlessly through header tape and grip fabric firmly without slipping, loosening, or falling out. Enjoy peace of mind all day long

【Package Included】 You will receive 30 curtain rods and 30 curtain hooks. Our curtain replacement kits are sufficient in quantity and can be shared with your family and friends to meet your daily use needs

Metal curtain hook: come with 120 pack metal curtain hooks in a clear storage box, enough to meet your needs and good for storing them without hurting your fingers
Hang Curtains and Set the Overlap
When you’re ready to hang the curtains for good, clip each hook onto its ring or glider, working from one end of the pole or track to the other. Make sure you’ve got hooks in every pleat at the back of the curtain heading, then fasten them securely.
For proper overlap, place one hook on the inside edge and one on the outside edge of the first panel, then add one hook on the outer edge of the second panel while leaving its inner edge free. This lets the panels overlap cleanly in the middle, giving you a fuller, more even blackout-friendly look.
Gently draw the curtains closed, and check that the fall is even across the full width. Shift them slightly to adjust overlap and alignment, then confirm the hooks sit level with the top edge so the pleats don’t distort.
Recommended Products

【Curtain Rings Size】 The drapery rings with eyelet inner diameter is 1.5 inch, small eyelet inner diameter is 0.29 inch, the thick is 0.14 inch, Suitable for curtain rods with a diameter of 0.8-1.2 inches
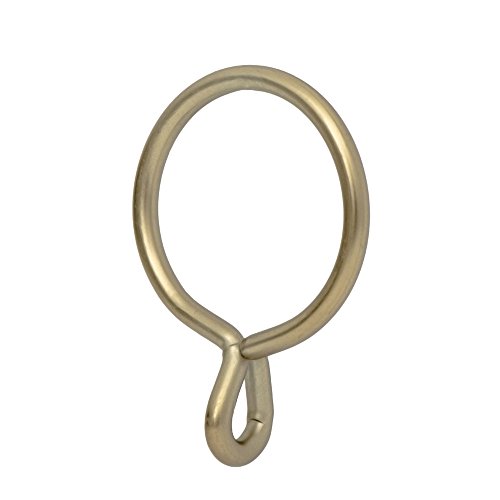
This set includes 14 small drapery eyelet curtain rings with fixed eyelet for panel pin hooks.

Amount of package: you will receive 60 pieces metal curtains hanging rings and 60 pieces metal curtain drapery pin hooks, nice combination and enough quantity for meeting your various requirements. Warning: Because the hook needs to pierce the curtain, the end is sharp. Keep out of reach of children and be careful not to cut your fingers or other body parts when using it
Tie Pleats to Set for 48 Hours
Although your curtains are now hanging, the pleats won’t hold their shape on their own just yet. You need to gently gather them back into neat pleats, then tie them closed so they “set” properly. This step will help the fabric remember its pinched form.
The pleats won’t hold their shape on their own—you need to gently gather, tie, and let them set.
Before you start the 48-hour wait, re-check the fall and overlap. Adjust any hooks or runners now, since fixing them later wastes your setting time.
Tie the pleats at the exact points where you want them to fall when open. Keep them tied for at least 48 hours, minimum. This patience pays off, especially in a living room where guests will notice uneven drapes.
After the full two days pass, untie your curtains and spread the pleats evenly. Your heading will look balanced, professional, and ready to impress.
Recommended Products


[Sufficient Quantity]: 60 pieces of pinch pleat curtain hooks, approximately 2.91 inches in length. Each traverse pleater is equipped with one main hook and four claw hooks. Sufficient quantity to meet your curtain installation needs. Used multiple times.

【READ BEFORE BUYING – CHECK CURTAIN COMPATIBILITY】 Only for already pleated curtains with hook pockets or slots built into the header — must allow hook to insert fully. These 85mm adjustable hooks are NOT compatible with grommet/eyelet curtains, rod pocket curtains, or pleater tape made for 4-prong hooks. Minimum pocket size required: opening over 8mm (0.31") and depth over 50mm (1.97") — not tight.If your curtain does NOT have slots, this will NOT work.

I've spent years obsessing over the details that make a house feel like a home — from the perfect bedding layers to a thoughtfully styled coffee corner. My focus is on modern, aesthetic home decor ideas that are beautiful, trend-aware, and actually achievable. Great style shouldn't require a big budget — just the right inspiration.
Follow on Facebook