
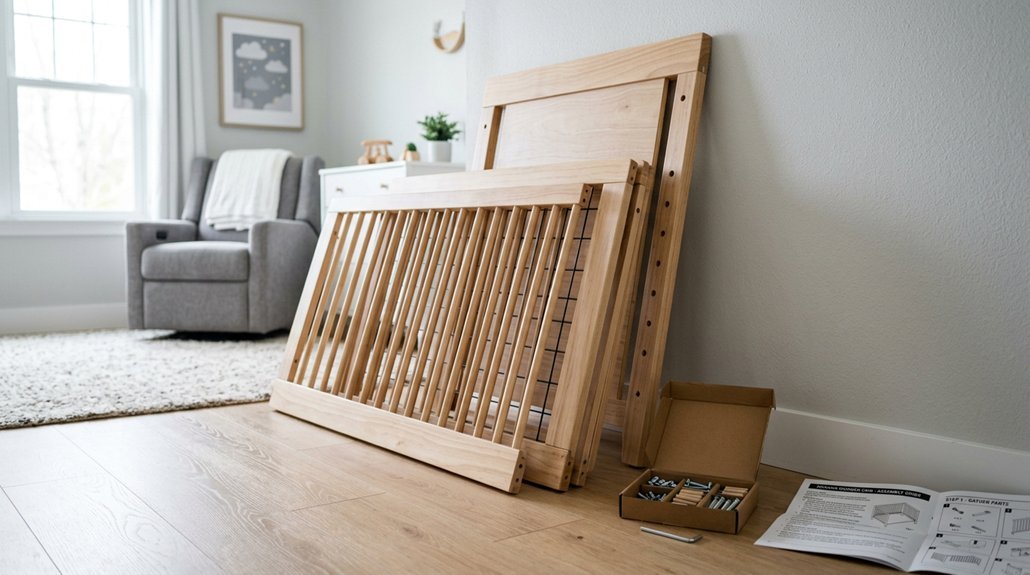


A tiny nursery holds enormous responsibility, and you’re standing in the middle of it with a box of wooden slats and a bag of bolts.
You need clear steps, not confusion, so you will start by spreading out every piece on a clean, padded floor space.
The manual matters more than you might think, so read it fully before touching a single tool.
Read the Crib Manual First
Before you touch a single piece, grab the instruction manual and read it cover to cover. You’ll follow the manufacturer’s instructions exactly, since steps change by crib model and skipping ahead risks your baby’s safety.
Use the parts list to check that every piece is there and undamaged. If something’s missing or broken, you’ll contact the manufacturer right away. Don’t start until you’ve got it all.
Look closely at which way pre-drilled holes face, and which side brackets or dowels point inward or outward. The manual shows this clearly. Set the mattress support at the highest position for your newborn, and place hardware on the correct pegs the instructions indicate.
Check that slat spacing meets Safe Sleep guidelines, typically no more than 2 3/8 inches. Tighten everything, then inspect twice for your baby’s safety.
Recommended Products

Reinforced Support for Extended Furniture Lifespan: Designed with high-quality spring wooden slats, it effectively disperses pressure, enhances the load-bearing capacity of metal frames or slatted bases, repairs sagging in mattresses or sofa foundations, and significantly prolongs the service life of your furniture.

High quality materials: Selected high-quality wood is made to ensure that it will not be deformed after long time use, providing you with long-lasting support and comfortable experience.
Clear Your Workspace and Protect Floors

You’ll need at least a 6-by-6-foot open area so you can spread out every panel, rail, and bag of hardware without stacking pieces on top of each other. Lay down a thick blanket, a flattened cardboard box, or a soft drop cloth to shield your floors from scratches and to keep the crib’s finish clean while you work.
Keep your tools and a small bowl for bolts within arm’s reach, and you’ll avoid scrambling around or losing parts once the assembly starts.
Recommended Products

♥️ 3-in-1 Convertible Design: Tatum 3-in-1 Convertible Baby Crib transitions from a crib to a toddler bed (includes toddler guard rail) and later to a daybed. It grows with your baby, making it a long-lasting and cost-effective choice. The simple design complements any nursery while providing a safe and comfortable sleeping space for your child.

♥️ 3-in-1 Convertible Design: Tatum 3-in-1 Convertible Baby Crib transitions from a crib to a toddler bed (the toddler guard rail sold separately) and later to a daybed. It grows with your baby, making it a long-lasting and cost-effective choice. The simple design complements any nursery while providing a safe and comfortable sleeping space for your child.

♥️ 3-in-1 Convertible Design: Tatum 3-in-1 Convertible Baby Crib transitions from a crib to a toddler bed (includes toddler guard rail) and later to a daybed. It grows with your baby, making it a long-lasting and cost-effective choice. The simple design complements any nursery while providing a safe and comfortable sleeping space for your child.
Floor Protection Methods
Start by picking a spot where the crib can stay put until it’s fully built, since dragging a half-finished frame through doorways risks dents, scratches, and loose joints. Once you’ve chosen your permanent assembly area, focus on floor protection. Lay down a blanket, an old comforter, or flatten the cardboard box the crib came in. This simple step prevents scuffs on hardwood and keeps carpet threads from snagging fresh finish.
Now you have a protected floor ready for work. Unpack and lay out parts on this padded surface before touching any hardware. Spread panels, rails, and screws where you can see everything. This visibility lets you check pieces against the manual, spot missing items early, and avoid kneeling on cold, hard tile while you work.
Keep your tools close.
Workspace Size Needs
A clear workspace makes assembly smoother and safer. You’ll need a large, open floor area in the nursery, one that lets you lay out panels, rails, and hardware without shifting the partly built crib. Spread a blanket or flattened cardboard box across the floor to protect both the surface and the crib finish during assembly.
Choose a spot with enough room to reach every corner of the frame, and keep your tools within arm’s reach. This prevents pauses that can cause misplaced fasteners. Set up on a level surface so bolts and dowels seat correctly, and so you can safely test stability during safety checks.
Unbox every part first, spreading them where you can see them clearly. This reduces missed hardware and damage from cramped handling, keeping crib assembly safe and efficient.
Inventory Every Crib Part and Tool
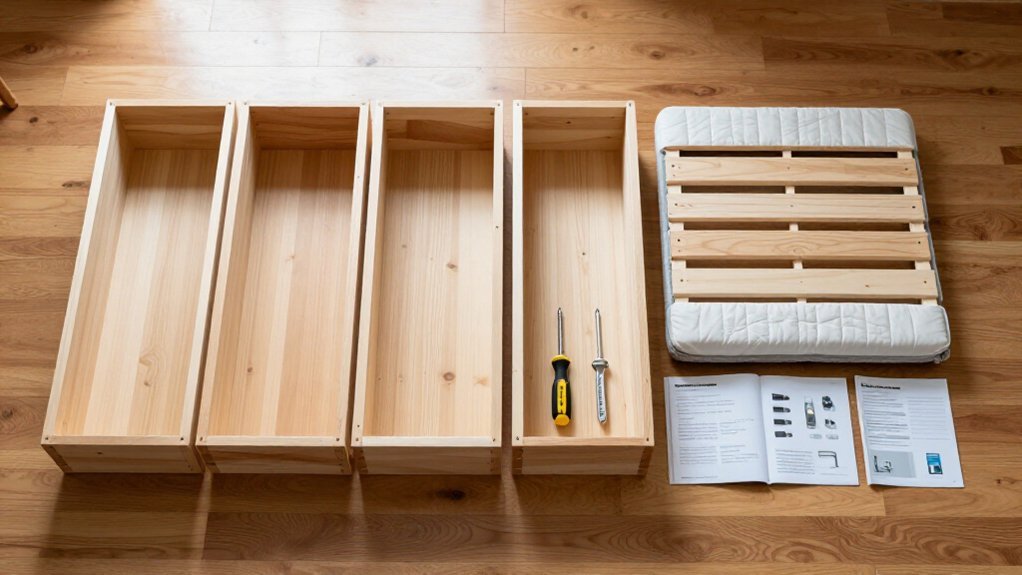
Any successful crib build begins with a complete inventory of every part and tool you’ll need. Unbox all crib components, lay every piece on the floor, and compare each part against your model’s manual to confirm nothing is missing or damaged for your baby’s safety.
Identify required tools before you start. Most cribs include an Allen wrench, but having a quality T-handle Allen set helps tighten bolts securely without stripping. Sort hardware into a small bowl or magnetic tray so screws don’t roll away, and verify you’re using correct hardware lengths for each joint.
Check all surfaces for safety issues during inventory. Look for splintered wood, peeling paint, sharp corners, or dampness, and stop to contact the manufacturer if you find damage.
Before assembly, confirm the mattress-support hardware and correct seating orientation match the manual, since the support must be installed exactly as specified for safe newborn use.
Recommended Products

【♚♚】Material: Metal;【♚♚】Quantity: 100pcs;

【COMPLETE KIT & CRITICAL SIZE VERIFICATION】This hardware kit includes a total of 56 pieces: 28 pieces of M6 bolts (in 20mm, 40mm, 60mm, and 80mm lengths) and 28 matching M6x12mm barrel nuts, plus a handy M4 wrench. IMPORTANT: M6 refers to the bolt's diameter (approx. 6mm). Please use a ruler to measure the diameter and length of your original screws to ensure a perfect match before ordering. Using incorrect sizes can damage your furniture.
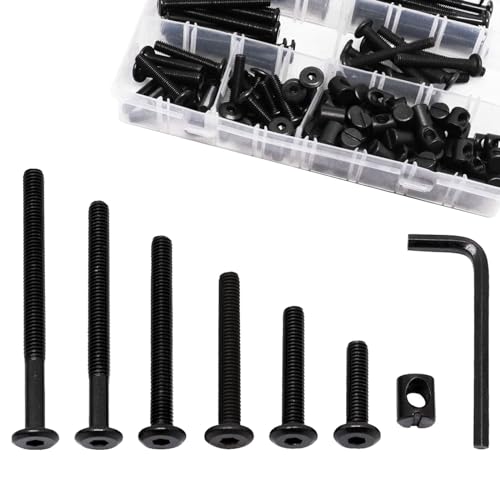
Size - Hex Socket Head Screws-M6 x15mm, M6 x 25mm, M6 x 35mm, M6 x 45mm, M6 x 55mm, M6 x 65mm, M6 x 75mm Furniture Bolt Hex Head
Assemble the Headboard and Footboard
Once you’ve finished your inventory, you’re ready to put together the headboard and footboard, which form the backbone of your crib’s frame. Lay the headboard and footboard flat on the floor, checking that the pre-drilled holes face inward, toward the inside the crib space.
Attach the latch brackets to the inside of the headboard so they face inward into the crib frame, unless they’re already installed. If your model uses side-board connections, insert that hardware now, fastening the pieces with the specified screws.
Select the highest mattress support base height for newborn use, then attach this stationary base to the headboard and footboard with the manufacturer’s fasteners.
To assemble the crib safely, do a quick alignment check. Confirm the holes and joints match your manual, and verify you haven’t mixed up similar screw lengths.
Recommended Products


ONLY CRIB RAIL THAT FIRMLY ANCHORS TO BED FRAME WITH REINFORCED CLAMPS for 100% safety. Cannot slip out of place like other crib rails.

ONLY CRIB RAIL THAT FIRMLY ANCHORS TO BED FRAME WITH REINFORCED CLAMPS for 100% safety. Cannot slip out of place like other crib rails.
Attach the Side Rails Loose for Now
You’ll hand-tighten the bolts first, leaving them just snug enough to hold the rails while still allowing some wiggle room for adjustments. Keep that slight looseness so you can shift the rails as needed, letting the pre-drilled holes line up easily without forcing anything.
Once everything sits square and true, you’ll come back to tighten them down firm and even.
Recommended Products

[Important Reminder]: Prior to placing your order, please measure the inside from your bed frame to ensure a perfect fit for these slats.

Strong. Made from South American Yellow Pine Wood which guarantees long endurance

Hand-Tighten Bolts First
Before you fully tighten anything, start by building the main crib frame and lining up the pre-drilled holes exactly as your manual shows. Thread each bolt in with your Allen wrench, but stop before they’re snug. You’ll hand-tighten everything first as you assemble the crib, so the joints can shift for proper alignment.
Now attach the side rails with all screws and bolts started, but keep them loose enough to wiggle. This prevents twisted or misaligned holes. If a hole won’t line up, loosen that section’s bolts, recheck the part direction, and check your hardware placement against the manual.
Once both side rails sit correctly and every bolt is started, you can finish tightening. Work in a star or X pattern to pull the joints together evenly.
Maintain Wiggle Room
After you’ve hand-tightened the main frame, you’re ready to attach the side rails with just enough tension to hold them in place. You’ll keep things loose on purpose, giving the joints a little freedom to shift.
Follow these steps:
- Hand-tighten everything first, leaving bolts loose enough for small adjustments.
- Set the side rails with snug tension, just firm enough to stay put.
- Wait to fully tighten until all rails sit in their proper spots.
Check your manual’s diagrams to confirm which end faces where. Once every rail lines up with its pre-drilled holes, you can lock everything down.
Tighten bolts in a star pattern to pull the frame together evenly, preventing warps or stress points.
Align Holes Easily
A little slack in the bolts makes alignment far easier when you’re attaching the side rails. You’ll align holes easily by threading bolts only until snug, not tight, so the rail can shift as needed.
Check your manual’s hole patterns before you start, since wrong direction causes mismatched joints on the Crib Frame. Compare both ends after positioning, and loosen rather than force hardware if holes don’t match.
Once every hole seats correctly across the frame, tighten all bolts for that section. The Consumer Product Safety Commission stresses secure assembly for safety. After rails are firm, you’ll attach the mattress support.
Work methodically through each step, and you’ll build a sturdy crib without frustration or damaged parts.
Lock the Frame Down in an X Pattern
Tighten every bolt you’ve installed so far, working your way around the crib in a star or X pattern. This method pulls the joints together evenly, so you lock the frame down without twisting anything out of shape. You’ll reduce the risk of gaps that could weaken the whole structure.
Tighten bolts in a star or X pattern to pull joints together evenly and prevent gaps that weaken the structure.
- Start at one corner, then move diagonally to the opposite side.
- Switch back across the frame, forming an X as you go.
- Recheck each connection for firmness before moving on.
Avoid overtightening bolts during earlier steps, but now you’ll fully secure each one. Recheck every corner and rail joint, confirming no gaps or looseness remain.
Finish by giving the crib a firm shake from multiple sides. It should feel like one solid piece with no wobble at all.
Recommended Products
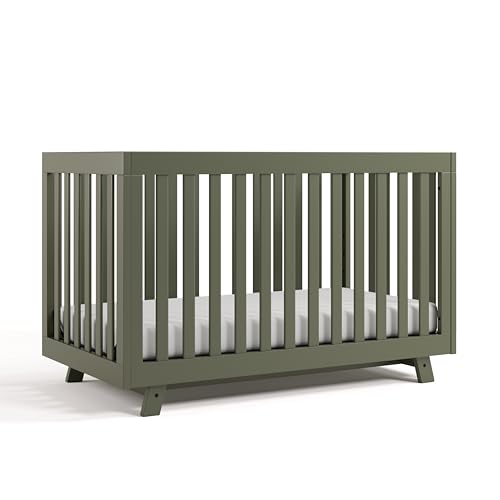
3-IN-1 CONVERTIBLE CRIB: Converts from baby crib (mattress sold separately) to toddler bed (compatible toddler guardrails sold separately), and daybed

STANDARD FULL SIZE CRIB & TODDLER BED MATTRESS - Designed to fit standard full-size cribs and toddler beds, this 52" x 28" x 5" mattress is made for a proper fit and firm support. Measure your crib before ordering, as this mattress does not fit mini cribs or playards.

BREATHE-THRU SAFETY: The ONLY crib mattress with a Wovenaire breathe-thru core. Our patented technology ensures optimal breathability, reducing the risk of suffocation and overheating. And because your baby is sleeping safe and sound, you’ll sleep better too. Measures 52" x 28" x 4". Core proudly made in the USA.
Set the Mattress Support at Newborn Height
You’ll set the mattress support at its highest position for your newborn, since this prevents strain on your back during frequent lifting and matches the manual’s guidance for this stage. Use only the exact holes and hardware your instructions specify, checking that the support locks in place with the correct orientation for your crib model.
Plan to lower the support immediately once your baby pushes up on hands and knees, repeating your shake test afterward to confirm everything stays secure.
Recommended Products

【SIZE INCLUDED】Baby bed crib screws bolts hardware kit includes 28pcs m6 x 20mm/40mm/60mm/80mm bolts and 28pcs m6x12mm barrel nuts,1pc m4 wrench;

**robust Construction**: Our Furniture Bolts and Barrel Nuts are crafted from zinc plated carbon steel, ensuring long-lasting durability and exceptional rustproofproof protection. These bed frame bolts guarantee that once installed, they provide a stable connection to the mating material, minimizing the risk of dislodgement. Ideal for diverse furniture projects, these components stand out in both quality and reliability.
Newborn Height Rationale
New parents often underestimate how much they’ll bend and lift during those first weeks, so start with the mattress support at its highest setting. This brings the mattress closer to waist height, saving your back with every pickup and laydown. Newborns can’t sit or climb, so you needn’t worry about them pulling up and toppling.
Take these steps to get it right:
- Check your manual for the highest set of holes, then install the mattress support there.
- Face the support’s marked side down, seating it fully on pegs or fasteners before tightening.
- Test the fit by pressing down, confirming no wobbles while baby sleeping.
Once your little one pushes up on hands and knees, lower the mattress immediately to prevent reaching the crib edge.
Proper Hardware Selection
Because you’ll be bending over the crib dozens of times each day, start by setting the mattress support at its highest position. Check your parts list to confirm you’re using the correct bolts and brackets marked for newborn height. These parts must meet current safety standards, so don’t substitute hardware from older cribs or other furniture.
Match the mattress support to the holes specified in your manual for the top setting. Look for manufacturer stickers or markings that show which side faces up; installing it upside down is a critical failure. Making your baby safe is your number one goal here.
Once positioned, shake the crib firmly to test for wobbling. Re-tighten any loose bolts until everything feels solid. The newborn stage allows this high setting since infants cannot yet push up on hands and knees.
Safety Transition Timing
When you’re lifting a newborn in and out dozens of times each day, setting the mattress support at its highest position saves your back and makes nighttime feedings easier. Place the mattress inside at this highest level, but only for the brief newborn phase.
Follow every step in your manual for hole and peg placement, since loose hardware creates real danger. You must lower the mattress once your baby pushes up on hands and knees, typically around five months. Delaying this change invites falls, and loose bedding near the highest level raises the risk of SIDS.
- Install the support at the top holes for newborn access.
- Drop to middle or lowest setting when mobility starts.
- Shake the crib and tighten bolts after any adjustment.
Do the Soda Can and Two-Finger Tests
Once you’ve tightened the last screw and checked that every bolt is secure, you’ll want to run two quick tests before letting your baby sleep in the crib. Take a moment to do the Soda can test. Grab a regular soda can and try sliding it between the slats of your baby’s crib. It should not fit through. Crib slat spacing must be no more than 2 ⅜ inches, about 6 cm. If the can slips through, the gap is too wide, and you’ll need to contact the manufacturer.
Next, do the two fingers mattress check. Push the mattress firmly into one corner, then look at the opposite side. You shouldn’t fit more than two fingers between the mattress and the crib frame anywhere. Run both tests as your final step.
Recommended Products

Added Safety for Better Sleep: Creates a protective barrier to help reduce the risk of your toddler rolling out of bed, giving you more peace of mind at night

- Include size: M6 x 35mm, M6 x45mm, M6 x 55mm, M6 x 65mm, M6 x 75mm Furniture Bolt Hex Socket Head;

↑↑ Package: 49 * Bolts, 49 * M6 Barrel Nuts , with one clear plastic storage box;
Avoid These 5 Common Assembly Mistakes
Even the most careful parent can slip up during crib assembly, and small errors can create real safety hazards for your baby. Follow the instructions closely, and you’ll build a safe crib without headaches.
Mix up your hardware, and you’ll weaken joints or damage parts, so compare every piece to the manual’s list before you start. Overtighten bolts early, and you’ll crack wood or strip threads, so hand-tighten first, align the frame, then finish tightening. Ignore alignment, and holes on the headboard won’t match the footboard, so loosen screws, re-check, and try again.
After assembly, shake the crib firmly, check that slat spacing is 2 3/8 inches or less, and verify all locks engage. These steps keep your baby secure.
Maintain Your Crib as Baby Grows
You’ve finished building the crib, but your work isn’t done. Inspect the crib every 2–3 months, tightening every bolt and screw around the entire frame. Your baby grows more active daily, and loose hardware creates real danger.
Always keep the mattress at the highest possible setting for newborns. Lower it immediately once your baby pushes up on hands and knees. Check that the space between the mattress and the crib stays snug, with no gaps larger than two fingers.
Run a firm shake test after any adjustment or growth milestone. The frame should feel solid, with no wobble. Verify slat spacing stays under 2 3/8 inches.
If you own a convertible model, use only the manufacturer’s kit, and shake test again after every conversion.
Recommended Products

WATERPROOF COVER: Waterproof vinyl cover easily wipes clean | Pattern on mattress cover may vary

ALL-IN-ONE NURSERY, MINI FOOTPRINT: Crib, changing station, and three storage drawers in one piece, measuring 53.78"Lx27.56 "W x 39.76"H. Full nursery functionality without full nursery square footage. Sized for apartments, smaller nurseries, and shared spaces.

3-IN-1 CONVERTIBLE CRIB: Converts from baby crib (mattress sold separately) to toddler bed (compatible toddler guardrails sold separately), and daybed

I've spent years obsessing over the details that make a house feel like a home — from the perfect bedding layers to a thoughtfully styled coffee corner. My focus is on modern, aesthetic home decor ideas that are beautiful, trend-aware, and actually achievable. Great style shouldn't require a big budget — just the right inspiration.
Follow on Facebook