


With the arrival of fall, it’s the perfect time to refresh your home decor and embrace the cozy vibes of the season. One great way to do this is by creating a DIY wooden coffee bar sign that adds charm and warmth to your kitchen or dining area. Whether you’re a coffee lover or simply enjoy hosting friends and family, having a personalized sign will elevate your coffee corner and make it feel inviting.
In this guide, you’ll learn how to create your very own wooden coffee bar sign, complete with a free template to make the process easier. You’ll walk away with a beautiful, handcrafted piece that reflects your style and love for coffee. This project is perfect for beginners, as it requires minimal tools and skills.
Get ready to express your creativity and enhance your home decor with a charming touch of autumn. The best part? This entire project can be completed in just 2-3 hours! Let’s dive in and get started on your DIY wooden coffee bar sign.
Skill Level: beginner
Time Estimate: 2-3 hours
TL;DR Summary
- Learn how to create a beautiful DIY wooden coffee bar sign for fall.
- This beginner-friendly project takes about 2-3 hours to complete.
- Free template included to simplify the design process.
- Perfect for enhancing your kitchen decor and creating a cozy atmosphere.
Recommended Products

PACKAGE INCLUDE: 9 pieces of fall stencils in different patterns and words. Each stencil is 8 x 8 inch, Which can help to create lots of beautiful festival crafts. Enough quantity and different patterns to meet your multiple decoration needs.

Package Included: 14pcs fall Stencils for Painting on Wood are great for vertical porch sign,doormats and round wood hanger decorating.
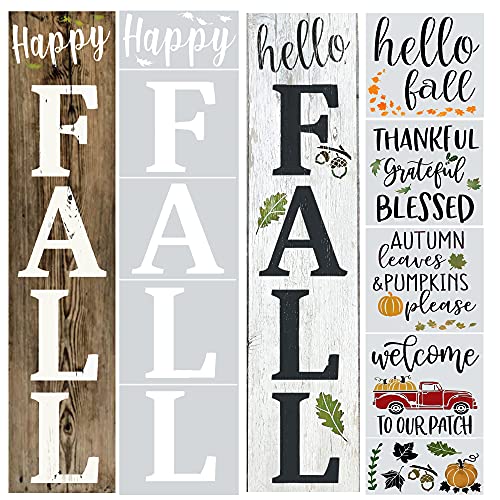
GREAT VARIETY OF HOME AND PORCH DÉCOR: Decorate your home with a wide variety of beautiful stencils, including a front porch Fall sign and 4 seasonal large sign stencils measuring 10 x 10 inches- “hello fall”, “THANKFUL Grateful BLESSED”, ”AUTUMN leaves & PUMPKINS Please” and “welcome TO OUR PATCH”
TL;DR Summary
Editor’s Choice

Wood Stain Powdered Solvent – Wood Dye – Indoor and Outdoor Furniture an…

GRENPRO Pink Tool Set Drill Set, 188PCS Tool Kit For Home with Pink Cord…

Custom Stencils for Spray Painting Make Your Own Stencil Personalized wi…
Prerequisites/Materials Needed
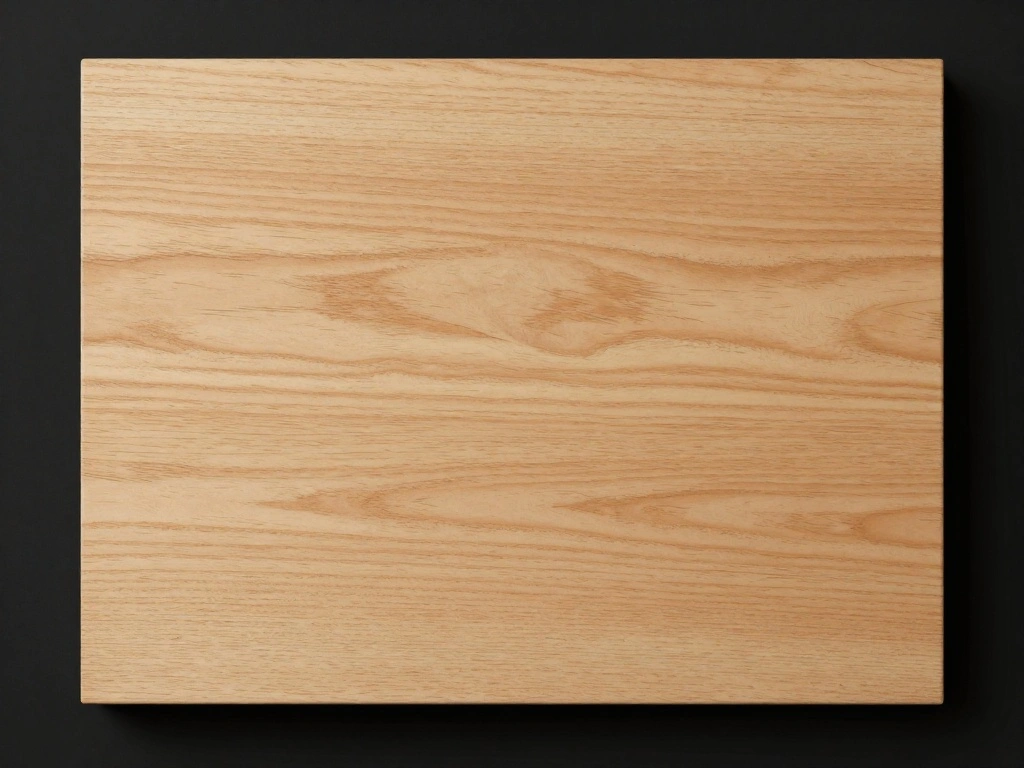
- Wood Board: 1 piece (1″ thick, 12″ wide, 24″ long)
- Sandpaper: 1 sheet (medium grit)
- Acrylic Paint: 2-3 colors (choose fall colors, e.g., orange, brown, cream)
- Paint Brushes: 2 (1 small, 1 medium)
- Free Template: Download the template provided
- Wood Sealer: 1 small bottle (optional for protection)
- Hot Glue Gun: 1 unit (optional for embellishments)
- Ruler: 1 unit (for measuring)
- Pencil: 1 unit (for marking)
Recommended Products

Ideal for use on all interior wood projects: furniture, cabinets, doors, trim and paneling

Sizing is based on Total width from left to right

WOOD PALLET PLAQUE BLANK -10x10 Inch Unfinished Wood Ready to Decorate and Personalize - For DIY , Gifts & Crafts
Prerequisites/Materials Needed
Editor’s Choice

Acrylic Paint Brush Set, 1 Packs / 10 pcs Watercolor Brushes Painting Br…

Varnish for Wood,Clear Protective Wood Finish,6.35 Oz Water Based Wo…

ROMECH 20W Mini Hot Glue Gun with 30 Glue Sticks Set, Fast Preheating Ho…
Skill Level & Time Estimate
Skill Level: beginner
Total time estimate for this project is around 2-3 hours. Here’s a breakdown of the time:
- Gathering materials: 15-30 minutes
- Preparing the wood: 30 minutes
- Painting and decorating: 1-2 hours
- Sealing (optional): 30 minutes
Recommended Products

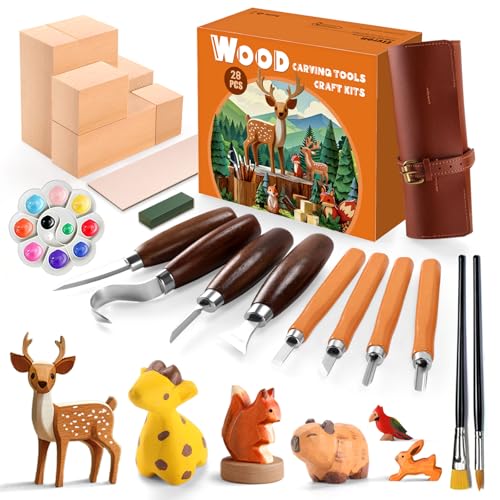
[Wood Carving Kit Deluxe Edition] Everything you need to start carving: 4 knives, 4 chisels, 7 basswood blocks, spoon blank, polishing compound, leather strop, sharpening stone, gloves, sandpaper, templates, and guide. All stored in a portable PU leather case—perfect for beginners and pros.

Wood Whittling Kit for Beginner Adults and Kids: have you ever heard about a comfort bird? These birdies bring comfort to people who are going through tough times. And we can carve such a bird!

Wood Carving Kit 23Pcs: Our wood carving kit provides everything that beginner or professional needs, 4 large carving knives, 5 small detail knives, 9 basswood blocks, polishing compound, leather strop, gloves, and an instruction manual. And all knives are organized in a portable bag for convenience.
Skill Level & Time Estimate
Editor’s Choice

Creative Hobbies 10×10 Inch Unfinished Wood Hanging Plaque – DIY Pallet …

Varathane Water-Based Crystal-Clear Ultimate Polyurethane | Interior Woo…

Shuttle Art Acrylic Paint, 36 Colors Acrylic Paint Set with Brushes & Pa…
Step 1: Gather Your Materials
Start your project by gathering all the necessary materials listed in the prerequisites section. Having everything on hand will make the process smoother and more enjoyable.
- Collect your wood board, paint, brushes, and any additional tools.
- Make sure to download and print the free template for the sign design.
Why this matters: Having all your materials prepared before you start will help you stay organized and focused during the project.
Pro Tip: Set up a clear workspace to avoid clutter and distractions.
Time Estimate: 15-30 minutes
Recommended Products

14-IN-1 Wood Burning kit - Package includes YIHUA 930-IV Pyrography Pen, 10 Pyrography Tips, 2 Unfinished Wood Pieces (square-shape), Flip-Up Pen Stand, Cleaning Sponge. This is a great wood burning kit for adults, and DIY lovers who are looking to start in pyrography
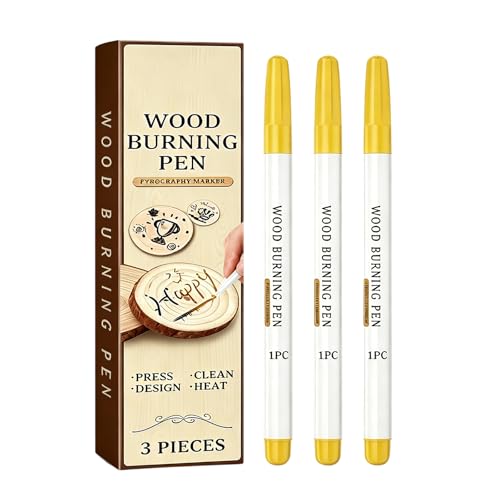
Versatile Use: Suitable for a wide range of materials including wood, wood slices, and cardstock, making it excellent for various crafting projects.

BE CREATIVE & HAVE FUN - Ready to start learning wood-burning? Our wood-burning kit is great for beginners, that’s why it comes as complete: 1 WOOD-BURNING PEN with adjustable temperature control, 1 STAND, 18TIPS-for wood burning drawing and stamping, soldering, and knife tip, 1 METALIC ALPHABET & NUMBER STENCIL–for more impact on work 1 COMPLETE GUIDE BOOK–with Tips, Tricks Techniques for Better Results - all in a storage BOX–for keeping everything well-organized.
Step 1: Gather Your Materials
Editor’s Choice

Multifunction Unfinished Wood, Wood for Crafts, Signs, Wall Decorations,…
Acrylic Paint Brush Set, 1 Packs / 10 pcs Watercolor Brushes Painting Br…

Apple Barrel Essentials Acrylic Paint Set, 12, 24 Fl Oz (Pack of 1)
Step 2: Prepare the Wood Board
Once you have your materials ready, it’s time to prepare the wood board. This step ensures that the surface is smooth and ready for painting.
- Use medium grit sandpaper to gently sand the entire surface of the wood board, focusing on any rough edges. This will help the paint adhere better.
- After sanding, wipe the board with a damp cloth to remove any dust particles.
Why this matters: Properly prepping the wood prevents any imperfections that could affect the final look of your sign.
Pro Tip: Sand in the direction of the wood grain for best results.
Time Estimate: 30 minutes
Recommended Products

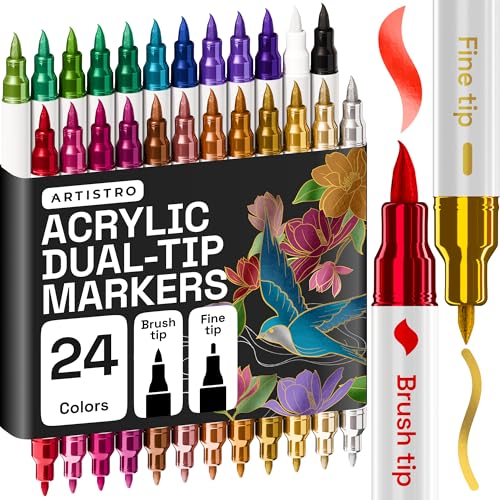
BRUSH + FINE DUAL TIP: Switch easily between detailed lines and expressive strokes with a 1 mm fine tip and a flexible 1–5 mm brush tip. These water-based acrylic paint markers are ideal for lettering, sketching, coloring, illustrations, and DIY art projects.

DUAL TIP FOR FINE & BOLD WORK: Each acrylic paint marker features a 1 mm fine tip for detailed lines and a 1 – 5 mm brush tip for bold strokes, lettering, coloring, and creative projects. Easily switch between precision work and broader coverage with one versatile marker

DUAL TIP FOR FINE & BOLD WORK: Each acrylic paint marker features a 1 mm fine tip for detailed lines and a 1–5 mm brush tip for bold strokes, lettering, coloring, and creative projects. Easily switch between precision work and broader coverage with one versatile marker.
Step 2: Prepare the Wood Board
Editor’s Choice

Handcrafted Classic Wooden Crozier | Elegant Crook Handle Walking Stick …

Rolybag Nail Sanding Bands 240 Grit Extreme Fine 200Pcs Black Profession…

KEVIN&SASA CRAFTS Painting Apron for Men and Women, Professional for Acr…
Step 3: Transfer the Template Design

Now that your wood is prepared, it’s time to transfer the design from the template to the board. This step will set the foundation for your painting.
- Place the printed template onto the wood board and secure it with tape to prevent movement.
- Using a pencil, trace over the design, applying enough pressure to leave a faint impression on the wood.
Why this matters: Accurately transferring the design ensures that you stay on track while painting, resulting in a cleaner finish.
Pro Tip: If necessary, use a ruler to measure the placement on the board for symmetry.
Time Estimate: 20-30 minutes
Recommended Products
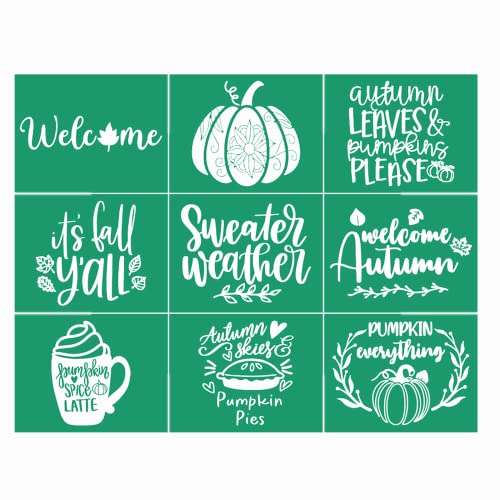
【Fall Theme Stencil】Reusable Autumn Bundle Stencils templates:welcome, it's Fall Y’all, autumn leaves pumpkins please, welcome autumn, happy harvest, welcome to our patch, hellp pumpkins, sweater weather, Autumn skies pumpkin pie, Pumpkin spice latte, pumpkin everything stencils.Fall stencils great gift for Halloween, Thanksgiving, Christmas, Birthday, holiday decor for home/staff room/farmhouse/office/garden,fun diy craft projects

【Package Included】: 12 separae leer and paern sencl o make a large vercal welcome sgn, 12pcs horzonal seasonal and cue shapes sencls You can combne hem freely o creae a perfec fron porch sgn

Suitable size: The “Happy Fall Y’all” painting stencil is perfect for 35” wood board,the “welcome” reusable stencil for crafts is perfect for 28-30” wood board.The 3 rectangle stencils which measure 11.8x5.5” can be painted on wood round sign for fall door decor.The 2 rectangle stencils which measure 14.2x5.5” is great for farmhouse wood board decor.
Step 3: Transfer the Template Design
Editor’s Choice

Nicpro 30pcs Paint Brush Set, Aesthetic Pastel Paintbrushes with Paint S…

Nicpro CP3000 Carpenter Pencil with Sharpener, Construction Mechanical P…
KEVIN&SASA CRAFTS Painting Apron for Men and Women, Professional for Acr…
Step 4: Paint the Base Color
Next, it’s time to paint the base color of your sign. Choose a color that will complement the fall theme.
- Using a medium-sized paintbrush, apply an even coat of your chosen base color over the entire board, including the traced areas.
- Allow the first coat to dry completely before adding a second coat if needed for better coverage.
Why this matters: A solid base color enhances the visibility of the design and creates a polished look.
Pro Tip: Use a small brush for detailed areas to avoid paint bleeding into unwanted sections.
Time Estimate: 30-45 minutes
Recommended Products

Water-based wood stain creates rich, even color in 1 coat on most surfaces

EFFECTIVE ON ALL WOOD SURFACES and QUICK DRYING: Furniture Clinic Wood Stain is a fast drying and highly concentrated wood stain making it effective on all indoor and outdoor wood surfaces. Our wood stain provides excellent coverage and ensures even color penetration. It's water based, environmentally friendly, and dries to a natural matte finish in only 10 minutes.

Step 4: Paint the Base Color
Editor’s Choice

Young Nails Acrylic Core Powder – Self-Leveling Acrylic Nail Powder, Cle…

Paint Brushes Set for Acrylic Painting, 20 Pcs Oil Watercolor Acrylic Pa…
KEVIN&SASA CRAFTS Painting Apron for Men and Women, Professional for Acr…
Step 5: Add the Design Details
Once the base color is fully dry, it’s time to add the design details to bring your coffee bar sign to life.
- Using a smaller brush, carefully paint the letters or designs from the template using contrasting colors.
- Take your time to ensure clean lines and even coverage on the details.
Why this matters: Adding the details is what makes your sign unique and visually appealing, showcasing your style.
Pro Tip: If you’re unsure about your painting skills, practice on a scrap piece of wood first.
Time Estimate: 1-1.5 hours
Recommended Products

Complete Wood Carving Kit for Beginners:This all-in-one DIY kit includes 4 premium carving knives, 4 detailing tools, 6 vibrant paints, a palette, 2 brushes, 6 smooth basswood blocks with templates, polishing compound, a leather strop, cut-resistant gloves, and a luxury leather storage case. Perfect for beginners, it offers everything needed to explore wood carving tools and create stunning arts and crafts for everyone alike.

***18+ Only - Age Verification Required 25-PREMIUM WOOD CARVING TOOLS FOR EVERY PROJECT:This comprehensive wood carving kit includes 3 chisels, 8 whittling knives, 5 detail knives, 1 scriber, 1 hammer, 1 marking knife, 1 large sharpening stone, polishing paste, a leather strop, and safety gloves. Perfect for wood carving, spoon carving, stone carving, and detailed craftwork, it meets all your artistic needs whether you're a beginner or a professional.
Step 5: Add the Design Details
Editor’s Choice
KEVIN&SASA CRAFTS Painting Apron for Men and Women, Professional for Acr…

10PCS Palette Knife, Stainless Steel Painting Knife Set, Flexible Spatul…

Hula Home Stained Glass Mandala Art Kit – DIY Window Clings with Markers…
Step 6: Apply Wood Sealer (Optional)
To protect your sign and ensure it lasts through the seasons, consider applying a wood sealer.
- Once all paint is dry, apply a thin layer of wood sealer using a clean brush.
- Follow the manufacturer’s instructions for drying times and additional coats if necessary.
Why this matters: A wood sealer protects against moisture and fading, keeping your sign looking fresh and new.
Pro Tip: Choose a matte finish for a more rustic look, or a glossy finish for added shine.
Time Estimate: 30 minutes
Recommended Products

Products Include: you will get 7 pieces of wooden coffee themed wall decorations, including 2 pieces of coffee cups, a [COFFEE], a [TEA], a [BAR], a [&] and a coffee bean decoration, which can help DIY come up with your favorite arrangement and add some life to your house

【Wood burning set Checklist】1xWood burning pen, 25 x assorted wood carving tips,1x holder with cleaning sponge,7x Stencils (numbers, letters and basic symbols set),1xHot blade,1xUser Manual,1x Storage Box.

3-Pen Kit & Pyrography Core Function: 1 box includes 3 wood burning marker pens. Formulated with polyurethane and acrylic polymers, it creates permanent burn marks on wood—ideal for small wooden signs or intricate patterns in wood crafting
Step 6: Apply Wood Sealer (Optional)
Editor’s Choice

Olympic WaterGuard 11 oz. Clear Exterior Waterproofing Wood Sealer Spray

Water-Based Crystal-Clear Ultimate Polyurethane | Interior Wood Protecti…
TopCoat HPS High-Performance Sealer for Household Cleaning, 16 oz Water-…
Step 7: Add Final Touches

With your sign painted and sealed, it’s time to add any final touches or embellishments to personalize your creation.
- Consider adding decorative elements like leaves, coffee beans, or twine to enhance the fall theme.
- Use a hot glue gun to attach any embellishments securely.
Why this matters: These final touches will give your sign a unique flair that reflects your personal style.
Pro Tip: Don’t overdo it—sometimes less is more when it comes to decor.
Time Estimate: 30 minutes
Recommended Products

DUAL TIP FOR PRECISE & CREATIVE WORK: Each acrylic paint marker features a 1 mm fine tip for detailed lines, writing, and outlining, plus a 1–5 mm dot tip for bold dots, patterns, decorative accents, and creative designs. Easily switch between precision details and eye-catching dot art with one versatile marker.

High Quality Dual-Tip Acrylic Paint Markers: Each marker features two wear-resistant fiber nibs to meet different coloring needs, eliminating the hassle of switching nibs and offering greater convenience for your creations. The 1-5mm round tip is ideal for painting large areas, while the 1mm fine tip is perfect for outlining and fine-line work. Whether you're a beginner or a professional, you can fully unleash your creativity!
BRUSH + FINE DUAL TIP: Switch easily between detailed lines and expressive strokes with a 1 mm fine tip and a flexible 1–5 mm brush tip. These water-based acrylic paint markers are ideal for lettering, sketching, coloring, illustrations, and DIY art projects.
Step 7: Add Final Touches
Editor’s Choice

210pcs Mini Fall Leaves, 5 Styles Resin Funny Miniature Leaves for Craft…


Pink Hot Glue Gun Cordless & Rechargeable, Auto Dispensing Mini Hot Glue…
Step 8: Hang Your New Coffee Bar Sign

Finally, it’s time to display your beautiful new coffee bar sign in your home.
- Choose a suitable location in your kitchen or dining area that complements your coffee setup.
- Use picture hooks or nails to securely hang the sign on the wall, or place it on a shelf for a more casual look.
Why this matters: The right placement enhances the visual appeal of your sign and your coffee bar area.
Pro Tip: Take a step back and assess the overall look before permanently securing the sign.
Time Estimate: 15-20 minutes
Step 8: Hang Your New Coffee Bar Sign
Editor’s Choice

4pcs Iron Leaf Wall Hooks – Black Rustic Single Hook for Hanging Coat, K…


Barnyard Designs Coffee Sign, Inspirational Wood Box Sign, Funny Office …
Pro Tips
- Color Coordination: Choose colors that complement your existing decor for a cohesive look.
- Practice Makes Perfect: If you’re new to painting, practice on scrap wood before working on your sign.
- Layering Techniques: Use layering techniques in your painting for a more textured appearance.
- Seasonal Updates: Consider updating your sign with different seasonal themes for year-round enjoyment.
- Share Your Work: Don’t forget to share your finished sign on social media for inspiration!
Pro Tips
Editor’s Choice
Mepase 6 Pcs Painting Artist Gift Sets for Women Include Canvas Tote Bag…

Personal Color Analysis Fan – 12 Season Color Fan, Skin Tone and Underto…
Wood Stain Powdered Solvent – Wood Dye – Indoor and Outdoor Furniture an…
Common Mistakes to Avoid
Warning: Not sanding the wood properly can lead to a rough finish.
Always sand down the wood before painting to ensure a smooth surface.
Warning: Skipping the sealer may cause your sign to fade or warp.
Consider sealing your sign for long-lasting durability.
Warning: Rushing the drying time can ruin your paint job.
Be patient and allow adequate drying time between coats.
Warning: Overloading with embellishments can make the sign look cluttered.
Keep it simple for a more elegant appearance.
Warning: Incorrect placement can make your sign less visible.
Choose a prominent location for maximum impact.
Common Mistakes to Avoid
Editor’s Choice
Acrylic Paint Brush Set, 1 Packs / 10 pcs Watercolor Brushes Painting Br…
Varnish for Wood,Clear Protective Wood Finish,6.35 Oz Water Based Wo…

Soft ‘N Style 4 Way Shiny Block / 4 Step Buffing Block Shine Nail Buffer…
Troubleshooting Section
Problem: Paint is bubbling or peeling.
Solution: Ensure the wood is clean and dry before painting. Sand the area and repaint.
Problem: The template transferred poorly.
Solution: Use a lighter hand when tracing to avoid deep impressions. Try again with a steady hand.
Problem: The sign doesn’t feel sturdy.
Solution: Reinforce with additional screws or brackets if necessary.
Problem: Paint looks uneven.
Solution: Apply a second coat after the first one dries completely for even coverage.
Problem: The sign doesn’t match my decor.
Solution: Consider repainting or adding additional decorative elements to enhance the overall look.
Troubleshooting Section
Editor’s Choice

Hex Socket Large Flat Thin Wafer Head Self Tapping Wood Screw(6mm,50pcs M3)

Sanding Sticks 50 Pcs, Double-Ended Sanding Tools for Wood & Plastic Mod…
Variations/Alternative Methods
Consider these variations for your coffee bar sign:
- Rustic Look: Use reclaimed wood for a more rustic appearance. It adds character and charm.
- Stenciling: Instead of freehand painting, use stencils for precise lettering and designs.
- Chalkboard Paint: Use chalkboard paint for a versatile sign that you can change seasonally or for special occasions.
Each method has its own benefits and can adapt to your personal style and needs.
Variations/Alternative Methods
Editor’s Choice

Rust-Oleum 206540 Chalkboard Brush-On Paint, 30 oz, Black
Encouragement Gifts, Empowered Women Gifts for Girls, Feminist Decor, Em…

FINGERINSPIRE 4 Styles Woman Stencils 8.3×11.7 Inch Water Drop Woman Ste…
FAQs
- What if I don’t have a printer for the template?
You can hand-draw the design based on the template or find a local print shop to print it for you. - How long should I let the paint dry?
Allow at least 1-2 hours for each coat to dry before applying additional layers. - Is it safe to use acrylic paint for food-related signs?
Acrylic paint is generally safe once dry, but avoid using it on surfaces that directly contact food. - What if I mess up the painting?
Don’t worry! You can sand down the area and repaint it for a fresh start. - Can I use this sign outdoors?
For outdoor use, ensure to apply a weatherproof sealant to protect it from the elements.
FAQs
Editor’s Choice
Hula Home Stained Glass Mandala Art Kit – DIY Window Clings with Markers…

Woodums – Women Script Wooden Wall Art Decor, Unfinished Wood Sign for…
Nicpro 30pcs Paint Brush Set, Aesthetic Pastel Paintbrushes with Paint S…
Conclusion

Congratulations on completing your DIY wooden coffee bar sign! You’ve not only created a beautiful piece of decor but also added a personal touch to your space. Enjoy the cozy atmosphere it brings, especially during the fall season.
Now that you have your sign, consider exploring other DIY projects to enhance your home. Whether it’s seasonal decorations or personalized gifts, the possibilities are endless. Keep crafting and enjoy the creative journey!

I've spent years obsessing over the details that make a house feel like a home — from the perfect bedding layers to a thoughtfully styled coffee corner. My focus is on modern, aesthetic home decor ideas that are beautiful, trend-aware, and actually achievable. Great style shouldn't require a big budget — just the right inspiration.
Follow on Facebook