
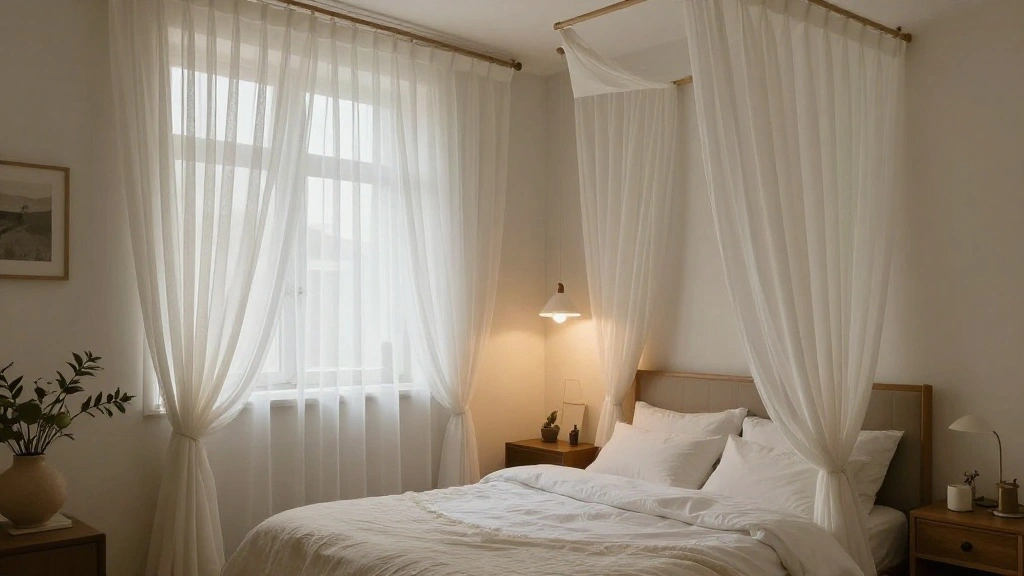


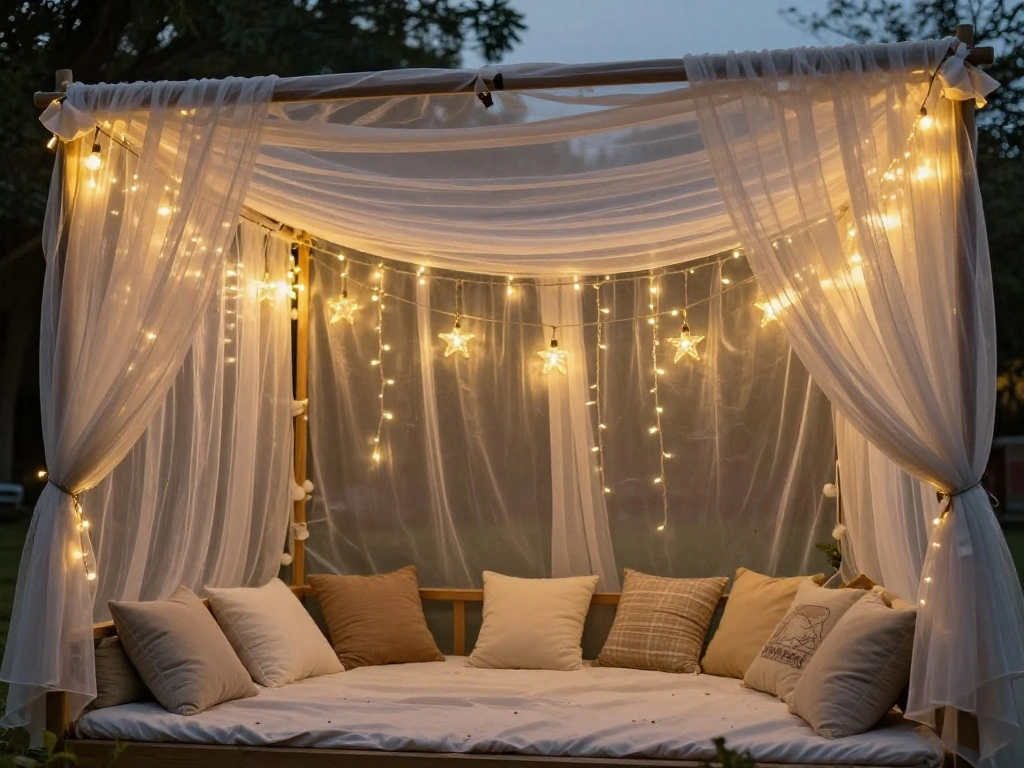
Are you looking to transform your space into a dreamy retreat without the hassle of installing ceiling hardware? The thought of a canopy effect can seem daunting, especially when it involves drilling holes or hanging complicated fixtures. But what if you could achieve this enchanting look using just sheer curtains and basic materials? This guide will walk you through a simple process to create a beautiful DIY canopy effect that adds elegance and charm to any room.
By following these steps, you will accomplish a stunning canopy effect with sheer curtains, creating an inviting atmosphere perfect for relaxation or entertaining. You will learn how to select the right materials, arrange the curtains effectively, and utilize creative techniques to hang them without any ceiling hardware. This project is designed for beginners and can be completed in an estimated 2-3 hours, making it perfect for a weekend DIY.
Get ready to elevate your home decor with a stylish canopy effect that is sure to impress your guests and provide a cozy escape just for you!
TL;DR Summary
- Create a dreamy canopy effect using sheer curtains without ceiling hardware.
- Gather basic materials: curtains, curtain rods, and clips.
- Follow 10 simple steps to achieve the desired look in 2-3 hours.
- Enjoy your transformed space, perfect for relaxation or entertaining.
Recommended Products

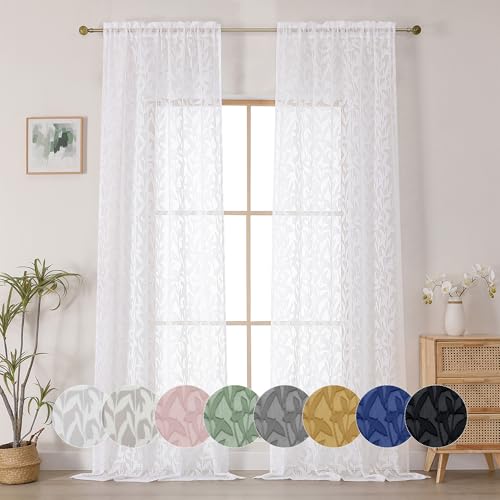
AMAZING MATERIAL: These lightweight scarf voile curtain is made in sheer material, touch to soft, and provides some privacy but allow light into the room. Sold as 1 panel.

🟢 HOME DECOR ESSENTIALS: LinenZone Window Scarfs Seamlessly Create New and Exciting Look for Every Room in Your Home! Available as Small Size 144 Inch Window Scarf, Standard 216 Inch Window Scarf, 288 Inch Extra Long Window Scarf and Even Longer 360 Inch Window Scarf Valance for Design and Style to Match Any Living Room Decor.

High-Grade Fabrics:DONREN Semi-sheer window scarfs are made from high thread voile 100% polyester, making them strong,long-lasting and less likely to rip or tear.
TL;DR Summary
Editor’s Choice

GXOACKJ Curtain Rods for windows 32-48 inch, 5/8 inch Decorative Curtain…

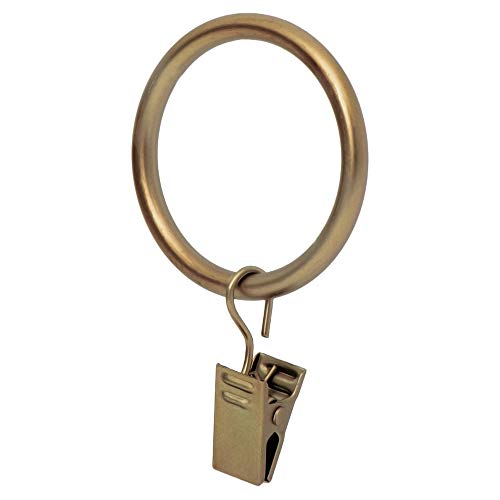
40 Pack Curtain Rings with Clips, Drapery Clips with Rings, Drapes Rings…

VISIONTEX Sheer Curtains 84 Inches Long 2 Panels Set Cream Beige Embroid…
Prerequisites/Materials Needed
- Sheer Curtains: 2-4 panels, depending on desired coverage and size of area.
- Curtain Rods: 1-2 rods (adjustable lengths preferred).
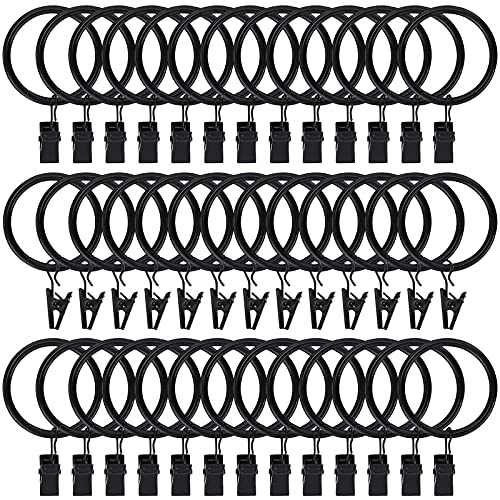
- Curtain Clips: 10-15 clips for easy hanging.
- Wall Hooks or Command Strips: 4-6 for securing curtain rods (choose according to weight).
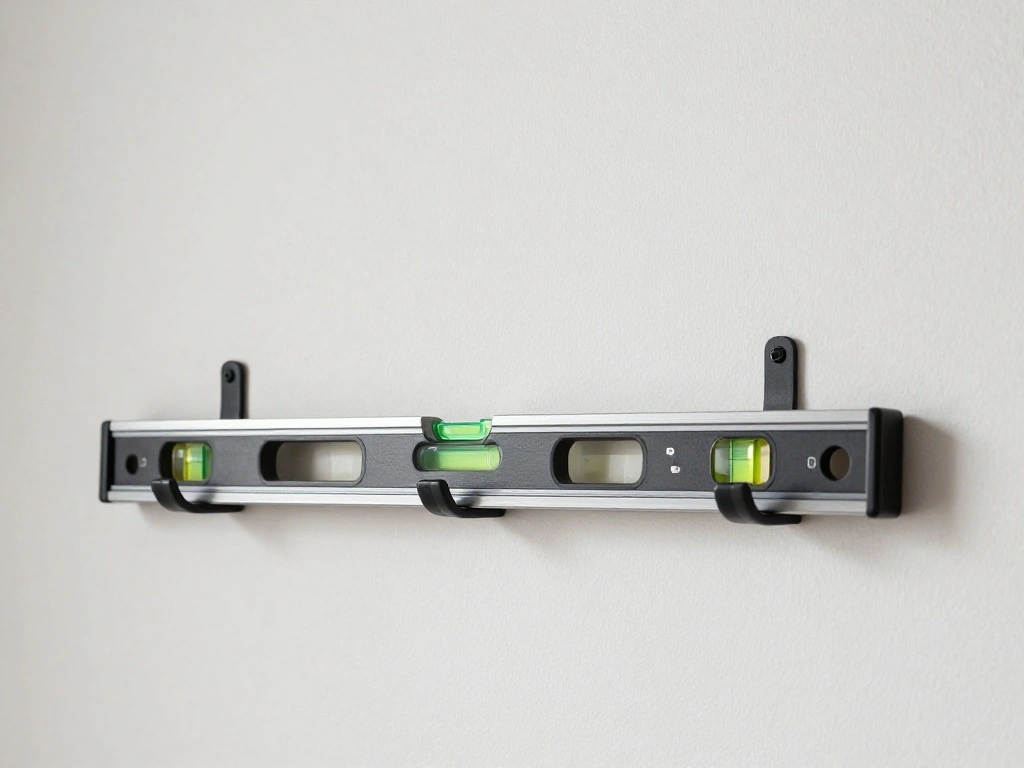
- Measuring Tape: for accurate measurements.
- Scissors: for trimming materials if necessary.
Recommended Products

NO DRILL, NO MEASURE INSTALLATION FOR QUICK SETUP Fast Fit design installs easily without drilling or measuring, helping save time and reduce wall damage during setup.

No Drill No Damage: Say goodbye to the drill that will leave holes on your wall. The Curtain rod is especially designed with strong adhesive brackets. Ideal for renters or anyone who wants to avoid holes, marks, and repairs.

Curtain Rods No Drilling: KAMANINA no drill curtain rods features an upgraded 3M adhesive mounting bracket, specifically designed for apartment renters. No need to punch holes in the wall and damage the surface. The curtain opens and closes smoothly, with a strong and stable mounting effect, helping you maintain a clean and aesthetically pleasing home environment. Crafted from GRS-certified (Global Recycled Standard) recycled materials, it’s a choice that cares for your walls and the planet. Tip: This curtain rod is only suitable for light curtains
Prerequisites/Materials Needed
Editor’s Choice

10 PCS Vintage Metal Wall Hooks, Bohemian Decorative Hook with Screws, W…

Curtain Rods 32 to 58 Inches (2.6-4.8ft), USFOOK 7/8 InchTelescoping Spl…

MIULEE Vintage Lace Curtains 84 Inches Long 2 Panels, Victorian Decorati…
Skill Level & Time Estimate
Skill Level: beginner
Time Estimate: 2-3 hours
Breakdown of time:
- Gathering materials: 30 minutes
- Measuring and preparing the area: 30 minutes
- Hanging the curtains: 1-2 hours
Recommended Products

20ft Extra Long Ceiling Drapes: 2 Panels 5ftx20ft White Backdrop Curtains for Parties. Totally 10FT(Width) x 20FT(Height). cortinas para fiestas decoracion.

PREMIUM MOSQUITO BED NET: This XL Mosquito Net is BIGGER than most other nets (Length: 86.6 inches, Width: 78.7 Inches, Height 98.4 Inches) to fits all beds from Single, Double to King.Beautifully Designed bed canopy will enhance your bedroom and homes décor by providing a draped canopy over your bed. You can turn your home and bedroom into the palace you’ve always dreamed
CONTAINS : Pack of 1 PC. Each panel is 30 Inch (Wide) x 20 Feet (Long). Thermal cutting no seaming technique. Seamless, one-piece design. Each panel is cut entirely from one single piece of fabric. It is perfect length for arch either round or rectangle for a elegant puddle drop. Soft and overhanging pendants make the wedding decorations more popular.This chiffon drapery backdrop can help your party to create a warm and elegant scenes.
Skill Level & Time Estimate
Editor’s Choice

Teenitor 25 Pack Curtain Clips for Hanging Curtain Hooks, Stainless Stee…

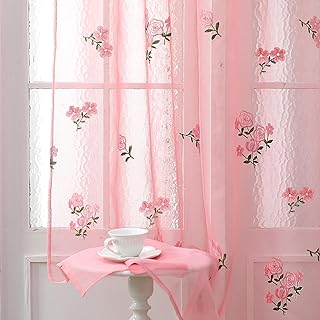
OVZME Blush Pink Sheer Curtains 63 Inch Length 2 Panel Set, Light Filter…

White Bed Canopy with 24 Colors Star Lights for Girls, 8 Corner Princess…
Step 1: Choose Your Location

Decide where you want to create your canopy effect. This could be above a bed, in a reading nook, or in a corner of your living room. An ideal location will have enough space to allow the curtains to drape beautifully.
- Examine the area for available wall space.
- Consider the height at which you want to hang the curtains.
- Ensure the area is free of obstructions such as furniture or light fixtures.
Pro Tip: Choosing a location with natural light can enhance the beauty of sheer curtains. Why this matters: A well-chosen location allows the curtains to flow naturally and creates a more inviting atmosphere. Time estimate: 15-20 minutes.
Recommended Products
DIMENSIONS: Inner diameter 1.5inch/3.81cm. External diameter: 1.77inches/4.5cm. Fits up to rod diameter 1.38inch/3.5cm (or rod circumference 4.34inch/11cm)

High Weight Burdening Capacity: These curtain hooks feature a strong weight-bearing capacity. They easily clamp the curtains, keeping them securely in place. Simply slide the curtain rings onto the rod for smooth operation. The sturdy tension clips can hold various types of heavy curtains, including thick pleated curtains, fabric bows, hats, crowns, photos, and other displays, ensuring a neat and tidy space

【Curtain Rings with Clips Package】Set includes 20 PCS Gold curtain clips with rings, very suitable for hanging thick drapery drapes hangers fabric bows hat caps etc.
Step 1: Choose Your Location
Editor’s Choice

4pcs Iron Leaf Wall Hooks – Black Rustic Single Hook for Hanging Coat, K…

SUQIOME 2 Pieces of Handmade Artificial Flower Curtain Holdbacks Clips W…

Sheer Curtains Pink Floral With Tie Backs Grommet Easy to Hang for Girls…
Step 2: Measure the Area
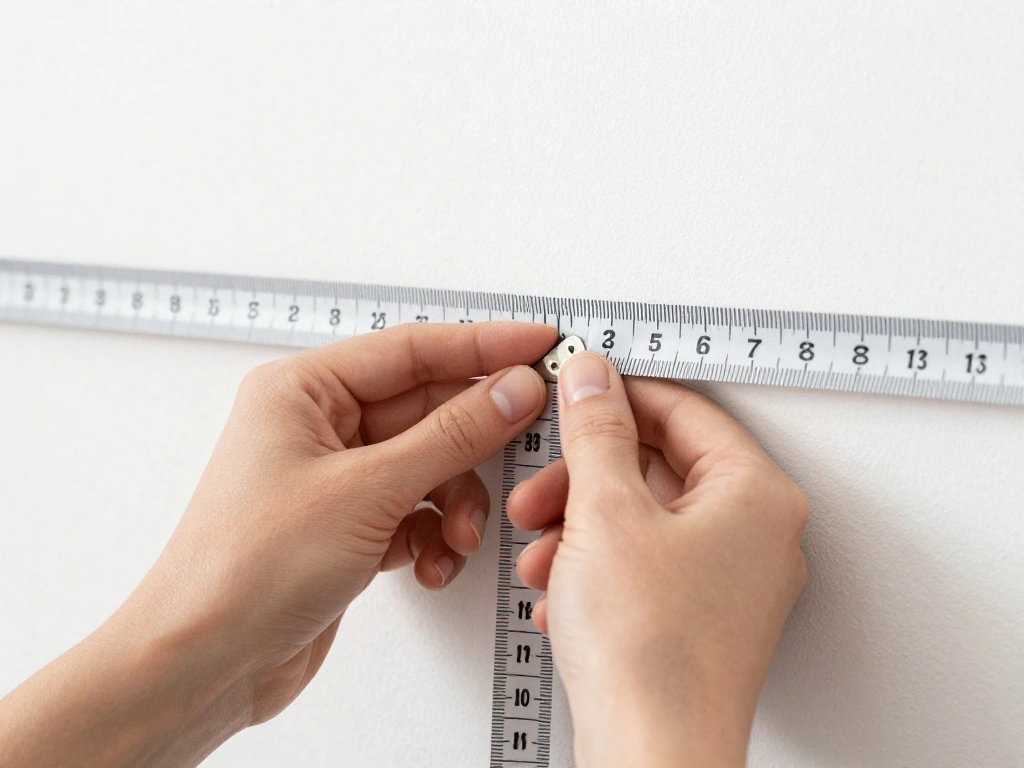
Accurate measurements are crucial for ensuring your curtains fit perfectly in the chosen space. Use your measuring tape to determine the width and height of the area where you’ll hang the curtains.
- Measure the width of the area and note it down.
- Decide how high above the floor you want the curtains to hang.
- Measure the height from that point to the floor or desired length.
Warning: Double-check your measurements to avoid cutting or purchasing the wrong curtain size. Why this matters: Proper measurements guarantee that the curtains will fit well and create the desired look. Time estimate: 15-30 minutes.
Recommended Products

This set includes 14 small drapery curtain clip rings for fabric panels, curtains or draperies.

【Curtain Rings with Clips Package Including】➤This set comprises 42Pcs clip rings curtains.These curtain clips with rings are with high quality and multi-purpose,which perfect for hanging your daughter's bows headbands,photo,party light,Christmas light hangers,lanterns,tent,object storage etc.
Sold as 2 Panels: Each package includes 2 pieces white long curtains. Each panel measures 40 inch width, 90 inch long(The curtain length not include top 1.5" header) 2 pieces 40 total width is 80 inches. The 2.5" rod pocket applicable to curtain rods no wider than 1". Multiple lengths and colors are available, please measure your window first for the right choose
Step 2: Measure the Area
Editor’s Choice

40 Pack Curtain Rings with Clips, Drapery Clips with Rings, Drapes Rings…

Hi-Spec Tool Set 25pc Pink Household DIY Tool Kit for Women. Small Mini …

Black Africa Women Sheer Curtains 84 Inches Long Giraffe Elephant Orange…
Step 3: Prepare the Curtain Rods
Now that you have your measurements, it’s time to prepare your curtain rods. Depending on your chosen design, you may need to cut the rods to the right length.
- If using adjustable rods, set them to the correct length.
- If cutting is required, use scissors or a saw to trim the rods carefully.
- Smooth out any rough edges after cutting to prevent snags.
Pro Tip: Use a fine sandpaper to smooth edges for a clean finish. Why this matters: Properly prepared rods ensure a smooth and safe hanging process. Time estimate: 20-30 minutes.
Recommended Products

PACKAGE INCLUDED - 1 sheer curtain + 1 free curtain rope. Detachable tab top design with inner diameter 3", which fits most of the rods.

Sold as 2 Panels: Each package includes 2 pieces white sheer curtains. Each panel is 42 inch in width by 216 inch in length. Top dual rod pocket design, the elegant sheer curtains constructed with 1.5" header and 2" rod pocket to applicate a curtain rod no wider than 1". Various lengths are available, please measure your window first to make an appropriate selection

🟢 HOME DECOR ESSENTIALS: LinenZone Window Scarfs Seamlessly Create New and Exciting Look for Every Room in Your Home! Available as Small Size 144 Inch Window Scarf, Standard 216 Inch Window Scarf, 288 Inch Extra Long Window Scarf and Even Longer 360 Inch Window Scarf Valance for Design and Style to Match Any Living Room Decor.
Step 3: Prepare the Curtain Rods
Editor’s Choice
VISIONTEX Sheer Curtains 84 Inches Long 2 Panels Set Cream Beige Embroid…
Curtain Rods 32 to 58 Inches (2.6-4.8ft), USFOOK 7/8 InchTelescoping Spl…
Step 4: Attach Wall Hooks
To hang your curtain rods without ceiling hardware, you will need to attach wall hooks or Command strips at the measured points. This step is crucial for securely holding the rods.
- Use your measuring tape to mark where the wall hooks will go.
- Drill holes if necessary, or peel and stick Command strips according to the manufacturer’s instructions.
- Ensure the hooks are level for a uniform look.
Warning: Check that the wall hooks can support the weight of your curtains. Why this matters: Securely attached hooks prevent the curtain rods from falling and create a safe installation. Time estimate: 30-45 minutes.
Recommended Products

Skip drilling, nails, and wall damage with these no drill curtain rod brackets. Designed for renters, apartments, dorms, and RVs, they install quickly and help keep walls neat and intact. Each adhesive curtain rod holder fits curtain rods from 0.6—1.5 inches, making it easy to upgrade your window space without complicated tools

【No Drill Curtain Rod Brackets】You will get 5/8 Inch diameter Curtain Rods with 4 piece No Drill Curtain Rod Brackets,say goodbye to traditional drilling methods,curtain rod bracket has a upgraded strong adhesive that Gone are the days of drilling and hammering into walls, leaving unsightly holes.Pro tip: 1.Wipe down the wall before sticking! 2.Add 2.5 inches to each end when measuring

4 Pcs Curtain Rod Brackets: You will receive 4 pcs universal plastic self adhesive curtain rod brackets with screw, which measures approx 3 * 1.8 * 2.4 inch. Suitable for curtain rods or towel rods with a diameter of 5/8'' to 12/8''. In addition, you can also hang small accessories such as hats, umbrellas, and towels.
Step 4: Attach Wall Hooks
Editor’s Choice

12 Pcs Pink Bow Shower Curtain Hooks, Decorative Shower Curtain Rings Ru…
Black Africa Women Sheer Curtains 84 Inches Long Giraffe Elephant Orange…

Lichamp Small Tape Measure 16 Feet, Pink Tape Measure Mini 3 Pack 16ft x…
Step 5: Hang the Curtain Rods
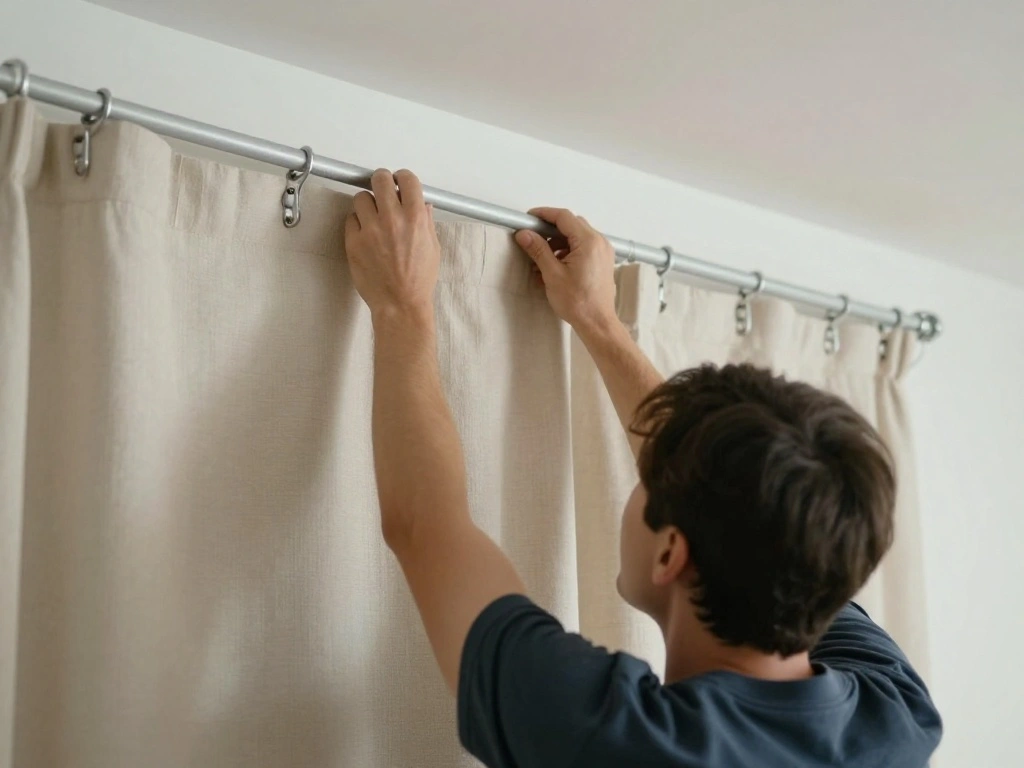
With the wall hooks in place, it’s time to hang the curtain rods. This is where your canopy effect will start to take shape.
- Carefully lift the curtain rod and slide it through the curtain clips.
- Secure the curtain rod onto the wall hooks.
- Adjust the height and position of the rod as needed.
Pro Tip: Ensure the rod is secure in the hooks before letting go. Why this matters: Proper installation of the curtain rods is essential for the overall stability of your canopy. Time estimate: 20-30 minutes.
Recommended Products

20ft Extra-Long Brown Ceiling Drapes - The brown ceiling drape is 5 foot wide and 20 foot height, You will get 4 panels brown drapes;20ft extra-long brown draping provide stunning floor to ceiling curtains effect, perfect for creating ceiling adorned with a romantic and elegant curtain.

20ft Extra Long Ceiling Drapes: 4 Panels 5ft x 20ft Long White Backdrop Curtains for Parties. cortinas para fiestas decoracion.

Package includes: 2 Panels 5ftx20ft Long Black Curtains backdrop for Wedding Parties. cortinas para fiestas decoracion.
Step 5: Hang the Curtain Rods
Editor’s Choice

Sheer Curtains 84 Inches Long, Traditional Ethnic African Woman Curtain …
10 PCS Vintage Metal Wall Hooks, Bohemian Decorative Hook with Screws, W…
Tegeme 2 Panels Pink Vintage Flora Sheer Curtains 84 Inches Long Embroid…
Step 6: Attach the Sheer Curtains
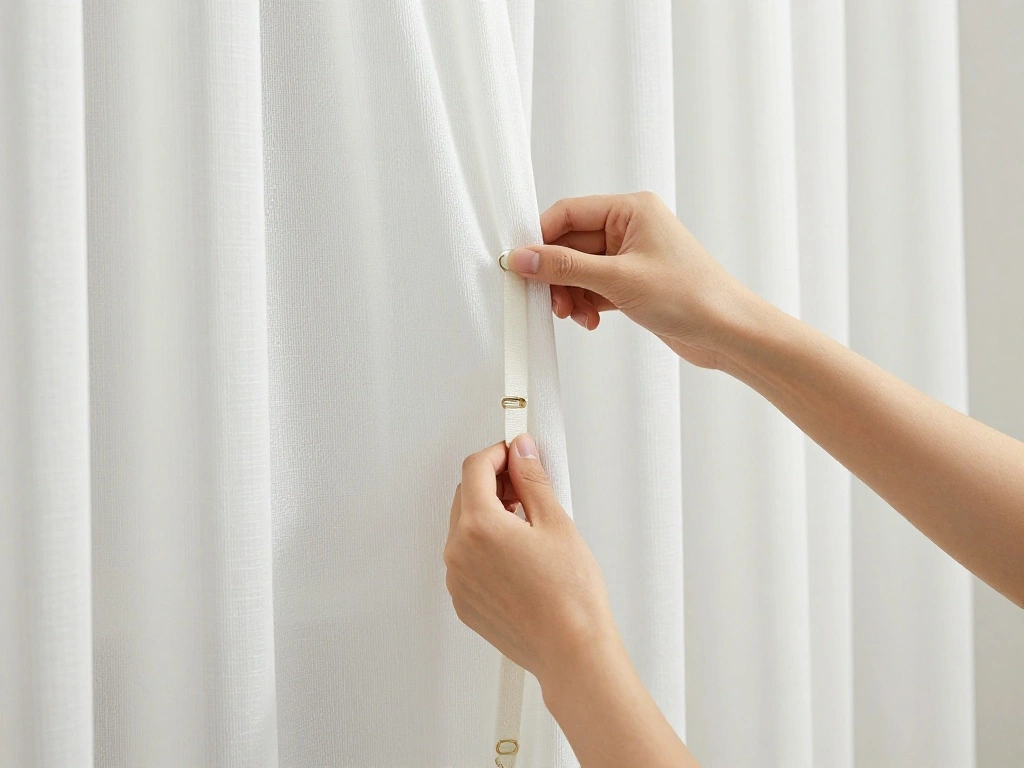
Now it’s time to attach the sheer curtains to your hung rods. This step enhances the aesthetic appeal of your space.
- Begin by gathering the sheer curtains and locating the clips.
- Attach the clips to the top of the curtains, evenly spacing them out.
- Hang the curtains onto the curtain rod, ensuring they are distributed evenly.
Pro Tip: Experiment with the number of panels to achieve your desired fullness. Why this matters: Properly hung curtains create a beautiful, flowing look that enhances the canopy effect. Time estimate: 30-45 minutes.
Recommended Products

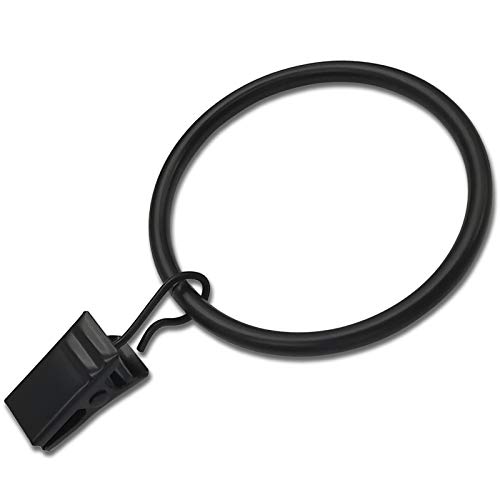
DIMENSIONS: The black curtain rings have an inner diameter of 1 inch (2.54cm), compatible with curtain rods up to 3/4 inch (0.75 inch / 1.9cm) in diameter.
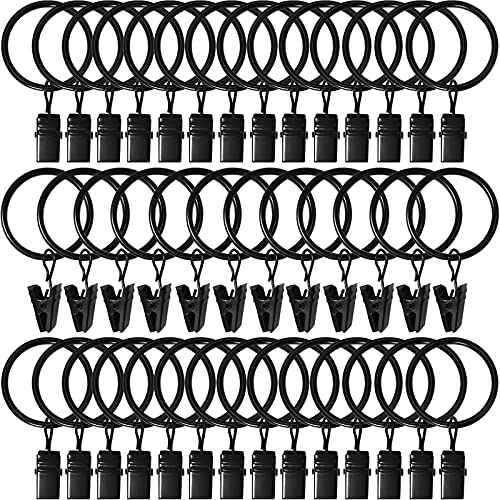
CURTAIN RINGS CLIPS PACKAGE: Set of 40 strong curtain rings with clips. Clip rings for curtains decorative drapery window.
【Curtain Rings with Clips Package】Set includes 20 PCS black curtain clips with rings, very suitable for hanging thick drapery drapes hangers fabric bows hat caps etc.
Step 6: Attach the Sheer Curtains
Editor’s Choice

42 Pack Curtain Rings with Clips 1.26″ Interior Diameter,Metal Drapery R…
Sheer Curtains Pink Floral With Tie Backs Grommet Easy to Hang for Girls…
GXOACKJ Curtain Rods for windows 32-48 inch, 5/8 inch Decorative Curtain…
Step 7: Adjust the Curtains
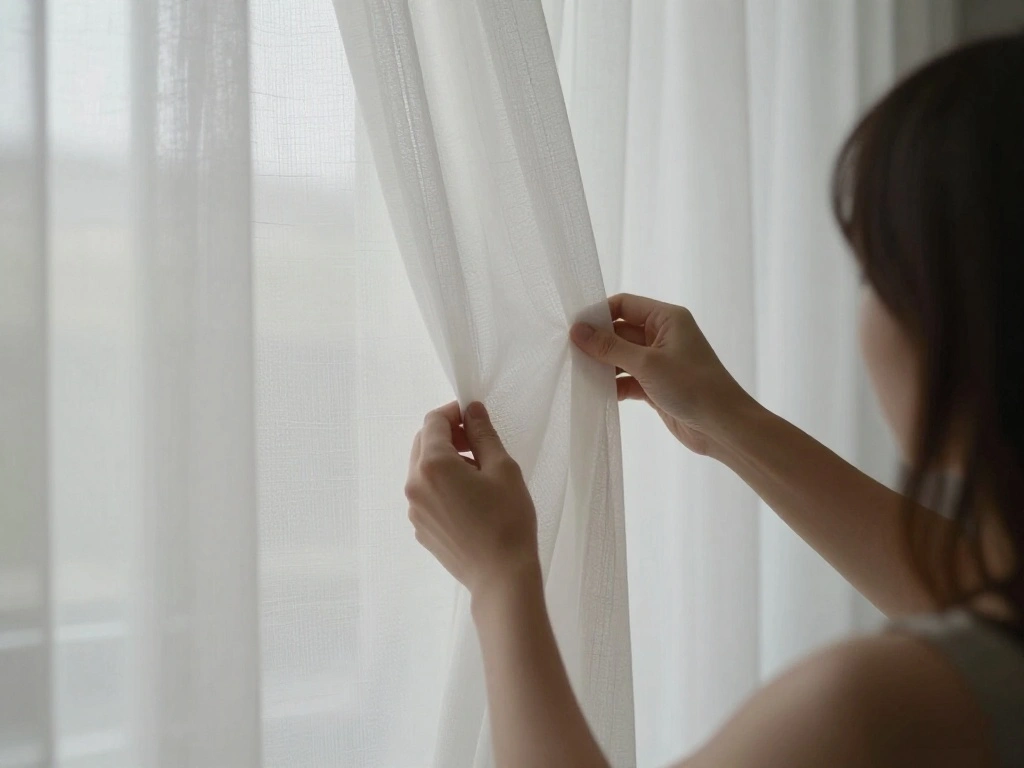
After hanging the curtains, it’s important to adjust them for the best visual effect. This step ensures the curtains drape beautifully.
- Gently pull down on the curtains to create folds.
- Adjust the height of individual panels to achieve uniformity.
- Step back and assess the overall look, making further adjustments as necessary.
Pro Tip: Use a steamer to remove any wrinkles from the curtains for a polished finish. Why this matters: Properly adjusted curtains enhance the overall aesthetic, making your canopy look more inviting. Time estimate: 15-20 minutes.
Recommended Products
This set includes 14 small drapery curtain clip rings for fabric panels, curtains or draperies.
LEAFY FLORAL PATTERN: The Wilshire sheer curtain panels offer a beautiful leafy floral pattern that add elegance into any room.
Measurements - 69” wide x 70” long. No liner needed. 12 hooks included. Made in Türkiye.
Step 7: Adjust the Curtains
Editor’s Choice

2 Packs Flower Curtain Buckle,Handmade Artificial Flower Curtain Holdbac…

HiLIFE Steamer for Clothes, Portable Handheld Clothing Steamer, 240ml Bi…

OWENIE Sheer Curtains 84 inches Long 2 Panels Set for Living Room/Bedroo…
Step 8: Add Decorative Touches
To elevate your canopy effect, consider adding decorative touches around and on the curtains. This step personalizes your space.
- Consider adding fairy lights within the curtain folds for a magical glow.
- Incorporate decorative garlands or fabric flowers for added charm.
- Arrange cushions or throws underneath the canopy for a cozy feel.
Pro Tip: Use battery-operated lights for a safe and convenient option. Why this matters: Decorative elements enhance the overall ambiance of your canopy, making it a unique and inviting area. Time estimate: 30-45 minutes.
Step 8: Add Decorative Touches
Editor’s Choice

5.2 FT Human-Shaped Throw Pillow Dolls Skin, Full Size Plush Dolls Girlf…

String Lights, 8 Light Modes 6ft 20 LED Rose Flower Garlands for Indoor …

Flower Earrings for Women Long Fabric Flower Tassel Earrings Bohemian Ha…
Step 9: Final Inspection
Once everything is in place, conduct a final inspection of your canopy. This step ensures everything is secure and visually appealing.
- Check that all hooks and rods are secure.
- Ensure the curtains hang evenly and drape beautifully.
- Make any last-minute adjustments to decorative elements.
Warning: Ensure the area is safe and free of trip hazards, especially with any added decorations. Why this matters: A thorough inspection helps prevent accidents and ensures that your canopy stays intact. Time estimate: 15-20 minutes.
Step 9: Final Inspection
Editor’s Choice

HNYYZL Curtain Clips,50PCS Plastic Curtain Rod Rings,Curtain Rings with …
Black Africa Women Sheer Curtains 84 Inches Long Giraffe Elephant Orange…

Silver Curtain Rod for Windows 48 to 84 Inches, 1” Heavy Duty Adjustabl…
Step 10: Enjoy Your DIY Canopy
Congratulations! You have successfully created a stunning canopy effect with sheer curtains. Now it’s time to enjoy your new space.
- Invite friends or family to admire your work.
- Use the area as a relaxing retreat or entertainment space.
- Consider taking photos to share your beautiful creation!
Why this matters: Enjoying the final product is the best part of any DIY project. It not only rewards your hard work but also enhances your living space. Time estimate: 15 minutes.
Step 10: Enjoy Your DIY Canopy
Editor’s Choice
White Bed Canopy with 24 Colors Star Lights for Girls, 8 Corner Princess…
40 Pack Curtain Rings with Clips, Drapery Clips with Rings, Drapes Rings…

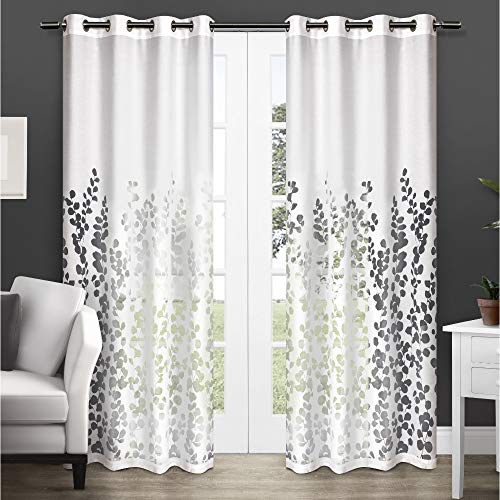
EXCLUSIVE HOME Sateen Twill Woven Room Darkening Blackout Grommet Top Cu…
Pro Tips
- Lighting Matters: Use soft lighting to enhance the ambiance under your canopy.
- Layering: Consider layering different types of sheer fabrics for a more dynamic look.
- Curtain Length: Choose longer curtains for a more dramatic effect.
- Seasonal Decor: Change decorations with the seasons for a fresh look.
- Maintenance: Regularly check and clean the curtains to keep them looking fresh.
Pro Tips
Editor’s Choice

2PCS Flower Curtain Ties,Boho Cute Curtain Holdbacks Elegant Curtain Tie…

AAtter Pink and Black Window Curtain Ombre Abstract Women Gothic Preppy …

TWINKVILLA Decorative String Lights Plug in with 10 Bulbs, Flower Garlan…
Common Mistakes to Avoid
Warning: Don’t skip measuring – inaccurate measurements lead to ill-fitting curtains.
Warning: Avoid using heavy rods or curtains without securing them properly, as they can fall.
Warning: Don’t rush the installation of wall hooks; proper placement is key to stability.
Warning: Avoid using too few clips; they can cause the curtains to sag.
Warning: Don’t forget to check for obstructions that may interfere with the curtain flow.
Common Mistakes to Avoid
Editor’s Choice

2pcs Dragonfly Coat Hooks Decorative Creativity Wall Mounted Hanger Hook…
40 Pack Curtain Rings with Clips, Drapery Clips with Rings, Drapes Rings…
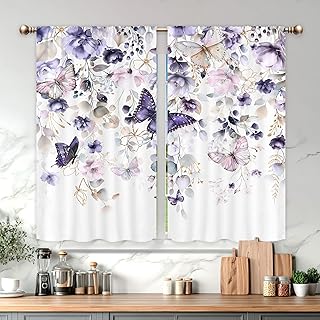
Purple Floral Flower Kitchen Curtains for Bedroom 27.5Wx39H Inch Rod Poc…
Troubleshooting Section
Problem: Curtains sag or don’t hang evenly.
Solution: Adjust the clips or redistribute the fabric evenly.
Problem: The curtain rod falls.
Solution: Check the wall hooks for security and weight limits.
Problem: Curtains are wrinkled.
Solution: Use a steamer to remove wrinkles for a polished look.
Problem: The area feels cluttered.
Solution: Simplify decor to create a more open feel.
Problem: Lighting is too harsh.
Solution: Add sheer lights to soften the ambiance.
Troubleshooting Section
Editor’s Choice
Teenitor 25 Pack Curtain Clips for Hanging Curtain Hooks, Stainless Stee…

5Pcs Bow Wall Hooks – MfhdgXAvs Gold Decorative Coat/Towel Hooks for Bat…

Jack & Rose Travel Steamer for Clothes,100-220V Portable Iron,15s Heat…
Variations/Alternative Methods
Consider these variations for achieving a similar effect:
- Using String Lights: Incorporate string lights into the curtains for added ambiance.
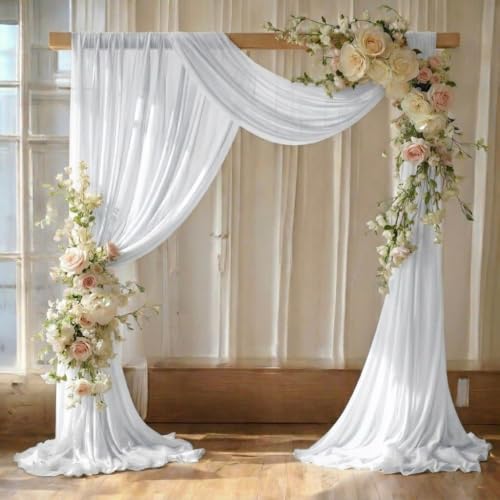
- Creating a Tent Effect: Drape the curtains from a central point for a tent-like feel.
- Mixing Fabrics: Combine sheer and heavier fabrics for a unique layered look.
Each method has its benefits, so choose based on your personal style and the look you want to achieve.
Variations/Alternative Methods
Editor’s Choice

Vogue Fabrics Simplicity 1707 Child’s and Misses Aprons Sewing Pattern, …
String Lights, 8 Light Modes 6ft 20 LED Rose Flower Garlands for Indoor …
AAtter Pink and Black Window Curtain Ombre Abstract Women Gothic Preppy …
FAQs
What if I don’t have enough wall space?
Consider using corner areas or smaller alcoves to create a cozy nook.
How long should I let the curtains hang?
Allow the curtains to hang for a few hours to settle before making final adjustments.
Is it safe to use Command strips?
Yes, as long as you follow weight limit guidelines provided by the manufacturer.
Can I wash the sheer curtains?
Yes, check the care label for specific washing instructions to keep them looking fresh.
What if my curtains are too long?
Simply trim them to the desired length using scissors or a fabric cutter.
FAQs
Editor’s Choice

20 lb XL 8 Pairs Heavyweight Picture Hanging Strips (16 Strips), Damage-…

1 Pair of Handmade Artificial Rose Flower Curtain Holdbacks,Curtain Tieb…
Black Africa Women Sheer Curtains 84 Inches Long Giraffe Elephant Orange…
Conclusion

Congratulations on successfully creating your DIY canopy effect with sheer curtains! You have transformed your space into a cozy and inviting retreat. Now that you’ve completed this project, consider other areas in your home where you can apply similar techniques for a cohesive look.
Keep exploring your creativity by trying different colors, patterns, or decorative elements to maintenance and enhance your canopy effect. Remember, every time you step beneath your beautiful canopy, you’ll be reminded of your accomplishment and the personal touch you’ve added to your home.

I've spent years obsessing over the details that make a house feel like a home — from the perfect bedding layers to a thoughtfully styled coffee corner. My focus is on modern, aesthetic home decor ideas that are beautiful, trend-aware, and actually achievable. Great style shouldn't require a big budget — just the right inspiration.
Follow on Facebook